As promised I will try to write up a tutorial on how I go about sculpting figures in 1/72nd scale. Mind you, there are many ways to Rome, this is just the one I prefer. I don’t pretend this is the easiest or fastest method but it’s the one that works fine for me. As Benno keeps saying, it isn’t rocket science, so hopefully some of you might wish to try sculpting themselves, and you will see, it’s not as difficult as it may seem at first glance. As you go along you will find out what works best for YOU, and you will adopt or dismiss some of the techniques described here and use others.
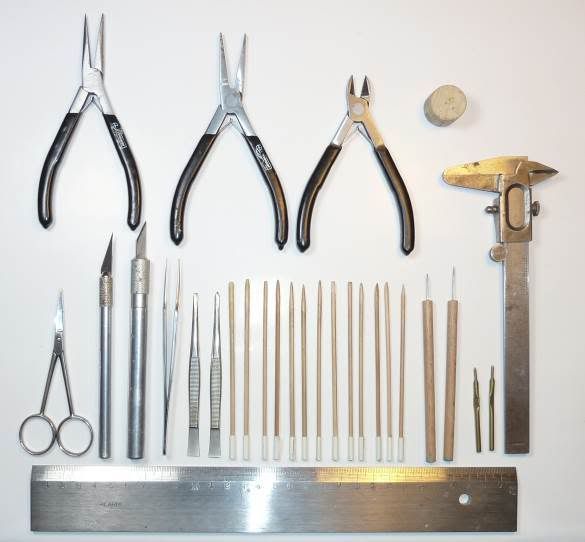
First of all, the tools of the trade. Nothing special here, really. Most important are self-made sculpting tools. For most of the work, I use cocktail sticks cut in half and filed and sanded to shape. The business end was then hardened with superglue, let completely dry, and sanded again. If necessary, repeat the process until you get a tool with a really good and smooth tip, it’s important there is no woodgrain on it any more. I also use some pins filed and sanded to different shapes and set into wooden handles. Furthermore, you will need different grades of abrasive paper. The two small devices down right are empty ball-pen refills which can be used to make buttons and various sorts of embellishments. Cut and sanded-down injection needles of different diameters come in handy for that purpose, too. You will also need a piece of cork such as a wine bottle cork cut in half.
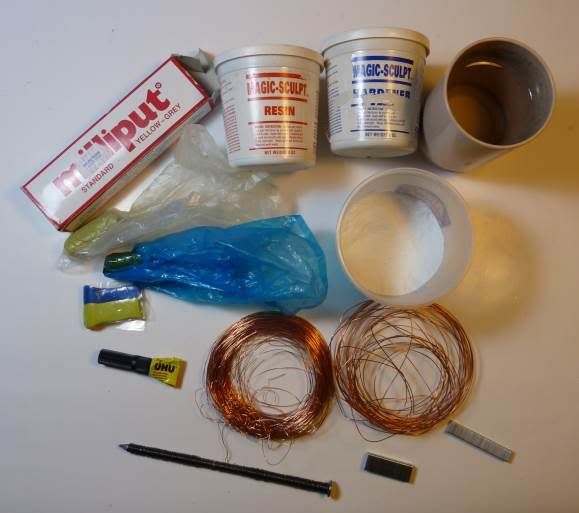
Next, materials used. You will need soft copper wire of different strenghts, maybe a somewhat stiffer iron wire, and staples of different sizes which are brilliant for scratching all sorts of edged weapons. As sculpting media, there are lots of brands around, and you will have to find out which you like best. The brands I use are Green Stuff (GS, also called Kneadatite in Britain) and Magic Sculpt (MS) mainly, as well as Milliput for some special purposes. Water and talcum powder are used as anti-adhesives. Use them in very small quantities just enough to ensure that the putty will not stick to your sculpting tools and fingers; too much water or talc will only lead to messing up your work. A slightly moistened finger, on the other hand (pun not intended), works miracles to smooth any sculpted surface.
Good lighting is essential for sculpting as well as for painting. Also, I do not sculpt or model directly on the surface of my worktable but on a large wooden box. You can use a large cardboard box for shoes instead or anything that brings the workpiece closer to your eyes. In any case, avoid bowing down and sitting in an awkward position. Some might also find a magnifyer handy; I use mine only to check the results of my work.
Sculpting the figurine starts from making a wire skeleton. Cut off and straighten an odd length of wire. I prefer using a thin (ca. 0.4 mm) iron wire for this purpose because it is less malleable than copper wire. Bend in half.
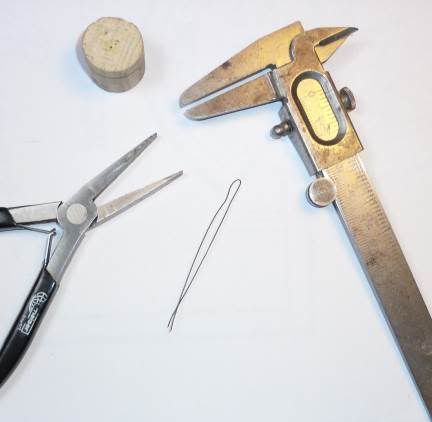
Grasp the bended end with a pair of pliers and start twisting it with a second pair. The twisted end should be as long as from head to hips. Use a scale figure with good proportions for comparison. In the Own Factory, we agreed to use old Italeri/ Esci 1/72 figures as a guideline. They are approximately 23.5 mm from head to heels (sorry for not using imperial measures here, I am quite unfamiliar with them), which measures up to ca. 1.68 m in 1/72 scale. That is a fairly good size for most historical periods we deal with. For more modern times, the figure may be slightly taller. Vary this if you want to make a tall, a middlesized or a small man (or woman for that matter).
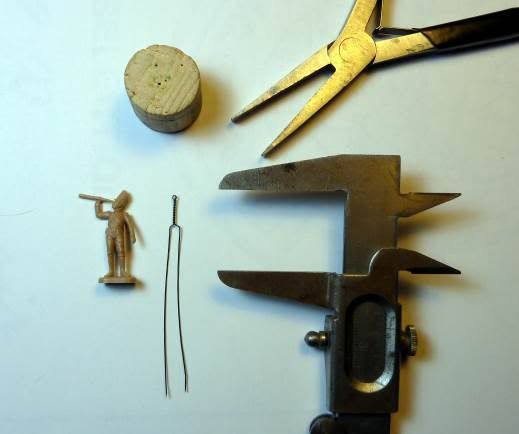
Now take the loose ends of the double wire and bend by 90 degrees to simulate the pelvis. Bend again to bring the legs back into line with the spine. Bend once more by 90 degrees where the feet are supposed to be. The distance from the noose at the top and this bend should be slightly less than the intended overall height of your figure, so let’s suppose it should be around 23 mm on average. Constantly check against your comparison figurine and with a slide gauge to make sure you are keeping within scale.
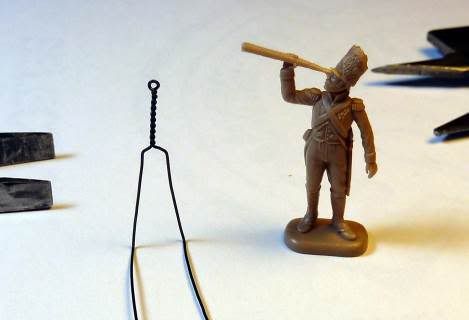
Now bend the loose ends again by 180 degrees. Leave a short length of double wire that will form a support for the feet.
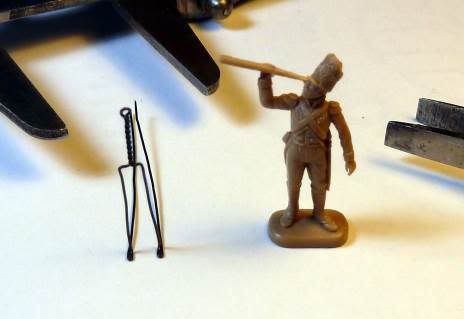
Bend one last time to bring the loose ends back into line with the skeleton. Clip them, leaving about 15-20 mm under the feet.
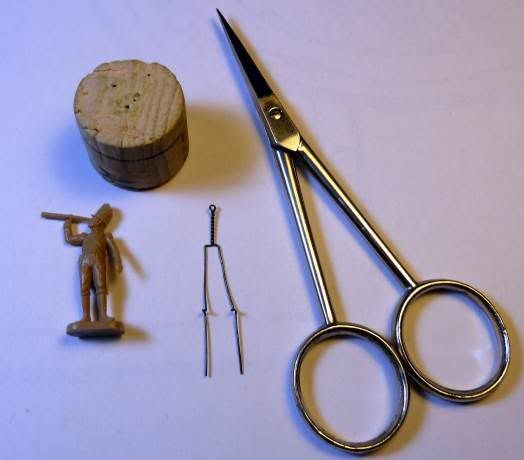
Now is where our little piece of cork comes in. Use a pin to make two holes in it where the feet are going to be placed. Insert the loose ends of your wire skeleton into these holes. Our wireman is fixed to the cork now, which will be our handle during the sculpting process.
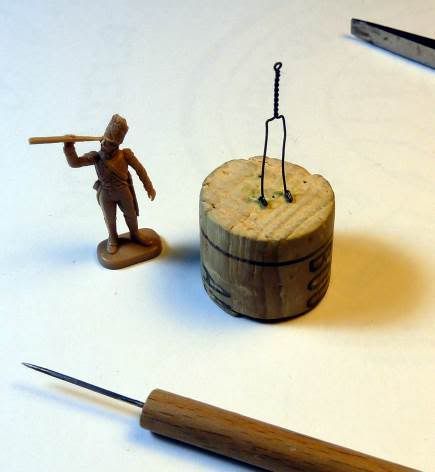
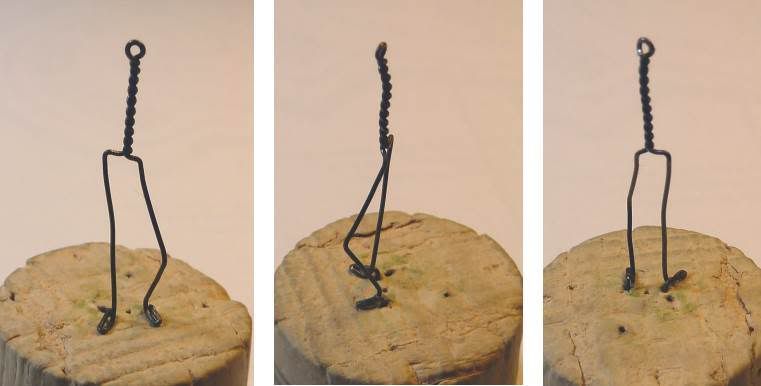
That is where the fun starts. Others would call this the artistic process. You have now to decide upon the pose of your sculpt. At this stage, you can still change the position of the feet. Most importantly, you have to twist and bend your wire assembly to make it resemble to a human skeleton. Note the sideview. I principally try to give the spine that slight S-shape typical of the human skeleton. Unimportant in that scale, you might say. Quite on the contrary, things like that can make all the difference between a natural pose and a somewhat odd-looking, ill-posed figurine. I suggest really taking one’s time at this step. Use good reference pictures, look at yourself in the mirror, let some innocent victim pose for you or use drawings from an art students’ manual that teaches how to draw a correct human shape.
Pay attention to the length of the thighs, to where the knees are supposed to be, and how the body moves if the weight rests on the right or the left leg. This is called the contrapposto in the arts; for a better understanding have a look here:
http://en.wikipedia.org/wiki/Contrapposto (beware, male frontal nudity!).
In our sample, the weight of the figure will be on the right leg, i.e. right hip comes high, left hip low, right leg is stretched, left leg is bent, left knee coming forward, upper body makes sideward movement to compensate for this and stay upright. Also pay attention to the direction of the feet.
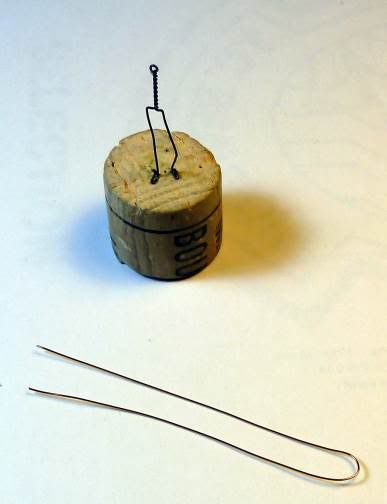
Next, shoulders and arms are added to the skeleton. For this purpose, I prefer using a length of fairly thin, soft copper wire. Bend in half.
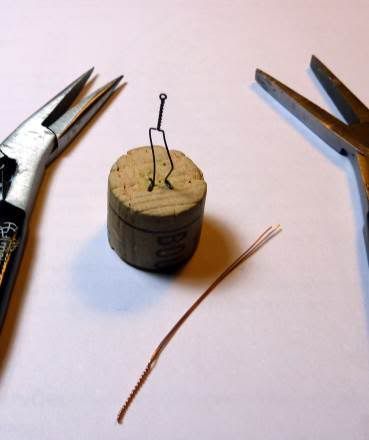
This is twisted again. The twisted part should have the length of one arm plus one shoulder. Mind you, in an upright position the fingertips of a stretched arm should reach down to the middle of the thigh. Check against the plastic figure and use the gauge.
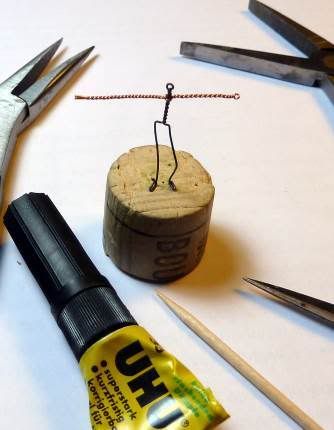
Now bring this into position at shoulder height. Leave the neck a bit longer than needed because the shoulders will be built up with putty. Twist the loose ends of the arm wire around the spine. Leave the second arm plus shoulder longer than needed, it will be adjusted later. Fix the arm/ shoulder wire to the spine with a drop of superglue.
Now sculpt the balance of the torso, head and legs, thus stabilizing your wireman. Dab the wire with superglue first to make the putty adhere to it. You could use any putty for that purpose, I prefer Milliput with a little GS added to it (ca. 1/4). Do not sculpt the arms yet, these will be brought into their final position at a much later stage, but make adjustments in the shoulders if an arm is to be held up. Note how the skull is located, its bulk is not ON the shoulders (a mistake commonly seen in sculpts) but IN FRONT of them. Keep everything fairly thin so you can still add a good layer of putty when sculpting the upper surfaces. After finishing, let everything set thoroughly before you continue.
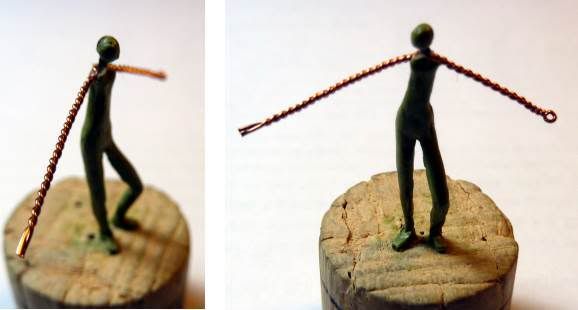
Different sculptors proceed in different sequences. I begin with the head because it’s the expression of the face that makes a figure for me. When the face is done I will know what the figure is about, what its body language is supposed to be. As an exception to the rule, I sculpt the head and face with pure GS. First a blob of GS is glued to the skull and brought into shape. I feel it is of utmost importance to check and re-check the size and shape of the head because this will make the figure a success or a failure. For a well-proportioned male adult the body is about 7 to 7.5 heads tall, so with a figure of ca. 23.5 mm the head should be no more than 3.4 mm from crest to chin line. If the head is bigger you get the impression of a smaller person but the figure will be out of scale if its overall size is still 23.5 mm; if the head is smaller the impression is that of a tall man but an underscale figure. We have been discussing proportion issues at length earlier on this forum, so I won’t go into any more detail here.
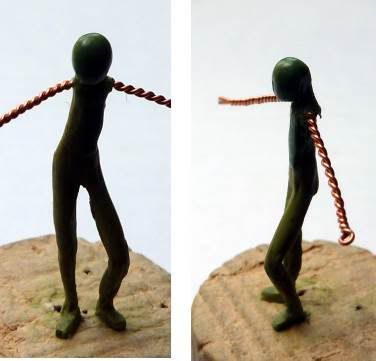
After the overall shape of the head has been defined make a horizontal cut where the browline is going to be. The eyes are to be placed in the horizontal centreline of the head, NOT above it.
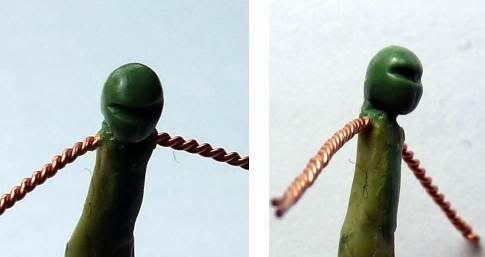
Now a piece of rolled putty is added vertically with its upper end in the cut. This weird-looking sausage will be formed into the nose and the chin.
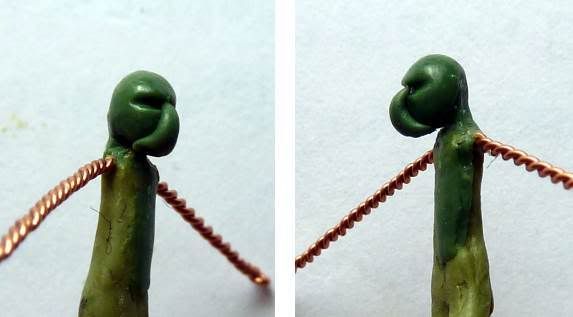
The sculpting of a face is a lengthy and intricate process that cannot be described in any detail here. This is also what requires most practice and experience. I suggest practicing face sculpting on scrap plastic figures. Cut off their heads, insert a wire noose into the neck and sculpt heads and faces on them. Again, you should use good reference material. In due time, you will be able to sculpt individual faces. Try giving them different expressions, vary sex and age. It’s difficult in the beginning, but as you get the hang of it it’s also the most rewarding part of figure sculpting if you ask me.
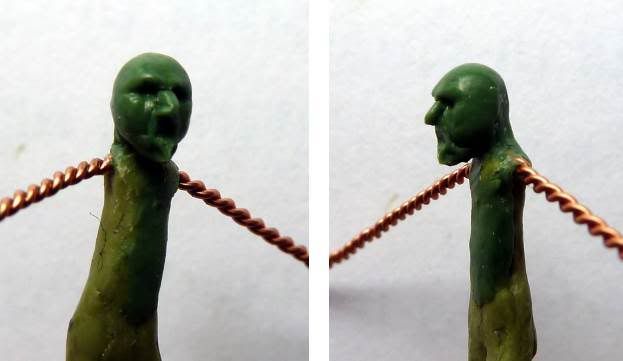
This pic shows the face half-way through the sculpting process, after its main features have been laid out.
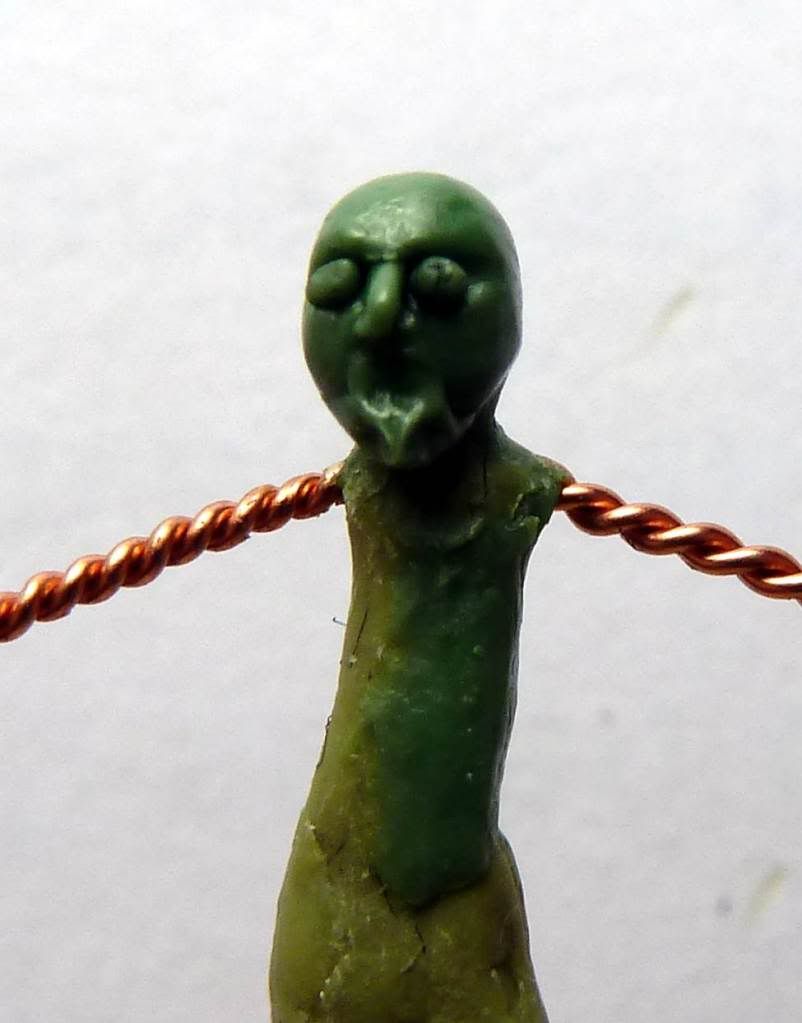
Usually, I add eyeballs and ears, using tiny bits of putty rolled into spheres, then stuck into their appropriate places und blended in to harmonize with the rest of the face. I am leaving off the ears in this particular case because they will be covered by hair. Good planning is essential, avoid sculpting anything that will be covered later on, and sculpt first what could be sculpted only with difficulty after having added another part to the figure.
Now this is the finished face, complete with goatee and moustache. I now usually add sideburns if appropriate (not for our gent!), but the head is left bald for the time being as his hair will be sculpted only after adding the headdress or, as here, the hair will be so long that it will cover part of the collar and shoulders.
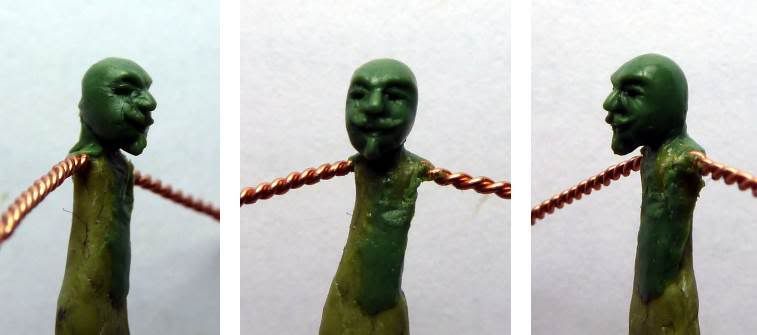
Head and face are sculpted in one session since I find it essential to be able to blend all the details well. After finishing the head, again, the further procedure is very much up to personal choice. As a general guideline, the sequence of the sculpting should be the same as when painting a figure, i.e. from inside out, but this has to be adopted to the particular style of clothing your figure will be wearing. In the small scales such als 1/72 though, many things can be done at a time that would have to be done one after the other in the larger scales. Having said that, you should take your time and put your figure aside to let sculpted parts set in order not to mess them up while working on another part. To the impatient, I recommend working on two or three figures at a time so you can work on one while the others are left to set.
For the sculpting of most of the figure I use a mixture of GS and MS, about one part on two, but you can vary that according to what you are doing and what the quality of the putty should be to achieve the best result (softer, more definable etc.). Frank Germershaus recommends mixing the GS in a ratio of five parts yellow on one part blue for best results, and his GS-MS mixture is 1/1; in any case, there should nearly always be definitely more yellow than blue in the mixture. The GS-MS mix will stay workable for about 60-80 minutes but during that time it will change its consistency. In the beginning, it is fairly soft, later on, it will get harder, and at this stage it will be easier to define sharp edges, bring out small details etc. You can use that quality to go back to certain details and rework them before the ultimate setting process has begun. This, too, is very much a matter of practice and experience.
The following steps of the sculpting process are pretty much self-explanatory, so let the pics speak for themselves.
First, the upper body has been sculpted.
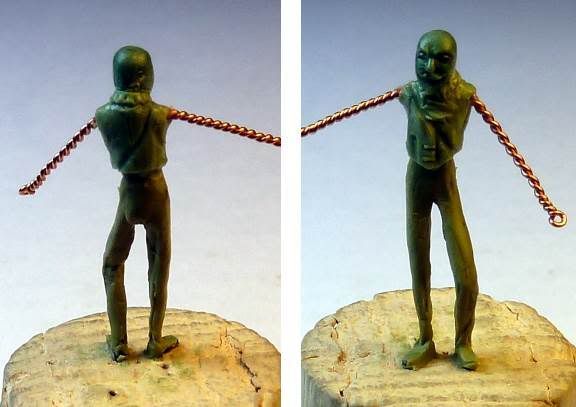
The left leg has been added.
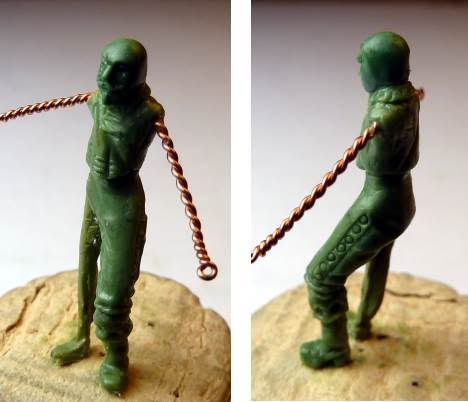
The right leg. The boots’ lace linings need to be refined by scraping them down a bit. I very often use the scalpel or fine abrasive paper to improve some parts of the sculpt after setting.
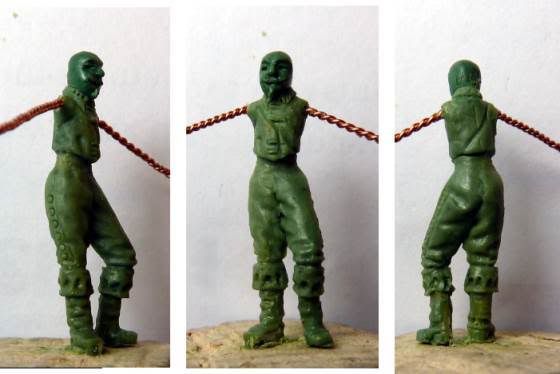
The tails of the buff-coat are added.
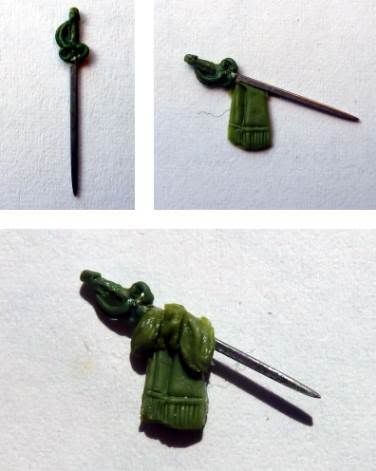
When sculpting a figure for casting you have to make sure there will be no undercuts that would tear apart the silicon mould. If there are, the obstructing parts of the figure need to be sculpted and cast seperately. Plastic figure manufacturers compromise on this, often giving their figures that odd twodimensional look. In order to avoid this, our gent’s rapier has been sculpted as a seperate part. This has been scratched from a filed-down staple, with handle, hilt and basket made from GS. (Scratching weaponry could be the subject of a seperate tutorial.) Since the lower part of the sash will be hanging over the weapon it is sculpted directly onto the latter. The rapier had been finished before the left side of the buff-coat was tackled, in order to press it gently into the putty while still soft, for good fit. The lower part of the sash and its knot were added to the rapier when the coattails were set. Fortunately, I did not have to sculpt the sword bandolier because it will be covered completely by the sash.
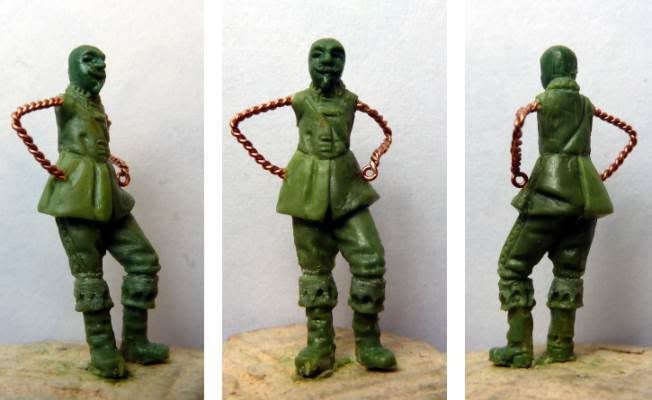
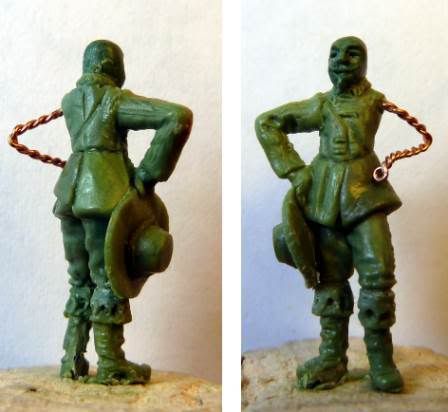
Now his right arm is added, plus hat being held in his right hand. The hat brim is made from a blob of putty, rolled out on a flat surface. Cut out with a round device such as a punch or a pen casing, of appropriate diameter (7 mm in this case), wait until the putty has set a bit but not yet completely hardened, then glue onto the figure and make adjustments.
His sash is sculpted over his right shoulder, making sure it will be running smoothly into the knot over the rapier.
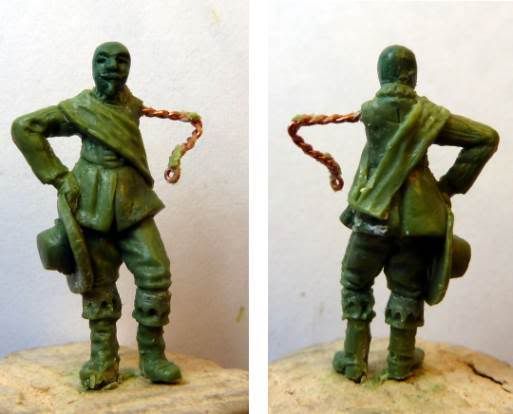
His left arm is sculpted to fit over the rapier/ sash assembly. As you see, this still needs to be thinned out a bit.
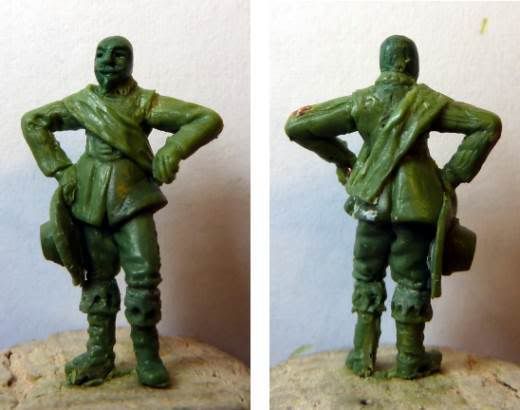
Spurs and spur leathers are added to his boots, as well as a feather to his hat. A pistol with snaphance lock was sculpted seperately and is made to hang from a leather flap and lace construction on his buff-coat (actually not really visible in our scale...). Our gent is finished by giving him a fashionable haircut. Some work is still needed to smooth surfaces and improve some of the details.
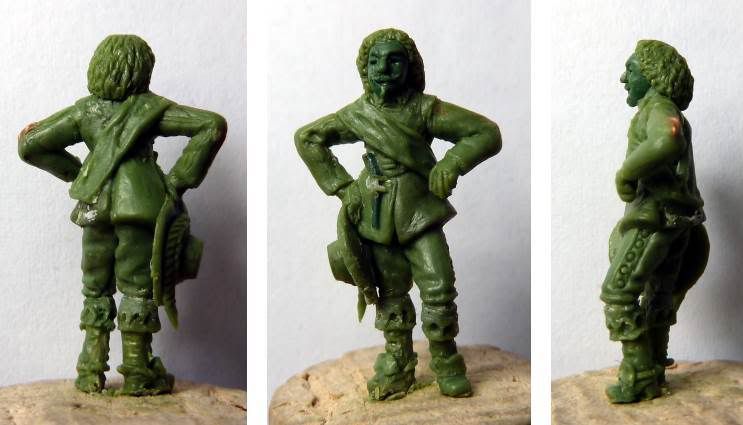
Et voilà, the cavalier of Edgehill and Naseby. He can now be moulded and cast as is or first be set on any suitable base. I use round cut-outs from my Milliput-GS mixture to base my figures. The wires coming out of the feet are cut short and then glued into the base while this is still soft to achieve a firm stance.
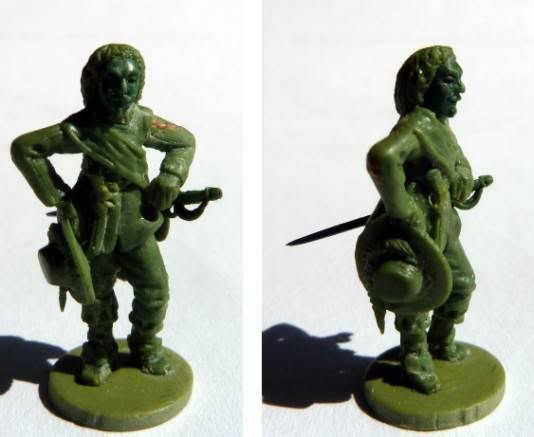
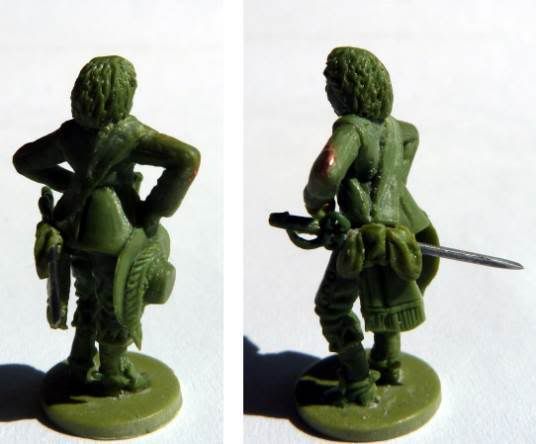
That was a rather lengthy tutorial, thanks for your interest. If you abode by me so far I hope you liked it, and I also hope that it might motivate one or the other to give it a try themselves. Do not wait any longer for your favourite figure manufacturer to come up with the figure you wish for, just sculpt it yourself (or convert the ones that are there, using Erik Trauner’s method).
For those who are interested, I relied on an illustration by Jeffrey Burn as my main reference, published in here:
- Haythornthwaite, Philip J[ohn]: The English Civil War 1642-1651. An Illustrated Military History, London: Brockhampton Press, 1998, reprinted 2002 [first publication: Poole, Dorset: Blandford, 1983], p. 67, plate 11, no. 27
Furthermore, for better information on the cut of the buff-coat I consulted:
- Tincey, John: Ironsides. English Cavalry 1588-1688, Oxford: Osprey, 2002 (Warrior; 44)
I can recommend both these books to all ECW buffs (buff-coats are for buffs after all, aren’t they?).
If you got any questions or criticizms fire away. I would also find it great if some of the other sculptors could chime in and share their techniques and experiences.


 Moderator


