Tutorials

Painting Multicam

Posted by Ben Bob on 10 Jul 2012, 23:53

Now that UCP will be discontinued soon for the US Army, I thought it would be a good excuse to paint some different moderns for my wargames.

This link contains a reference picture of the actual pattern. http://camopedia.org/index.php?title=File:Usa49.jpg This is currently issued to US units in Afghanistan already and is used widely in the darkness of the world of Special Operations. Even Russia, China, and a multitude of other nations use this in some units; therefore it is important to overcome the fear of painting this stuff.

I have compiled a small tutorial for painting this camo.

Colors used:
Tamiya:
XF-65 field grey
a mix of that and XF-3 Flat Yellow
Model Master:
4673 Wood
4707 Earth Red

Flat white and flat black
~~~~~~~~~~~~~~~~~~~~~~~~~~~~~~~~~~~~~~~~~~~~~~~~~~~~~~~~~~~~~~~~~~~~~~~~~~~~~~~~~~~~~~~~~~~~~~~~~~~~~~~~~~~~~~~~~~~~~~~~~~~~~~~~~~~~~~~~~~~~~~~~~~~~~~~~~~~~~~~

Image
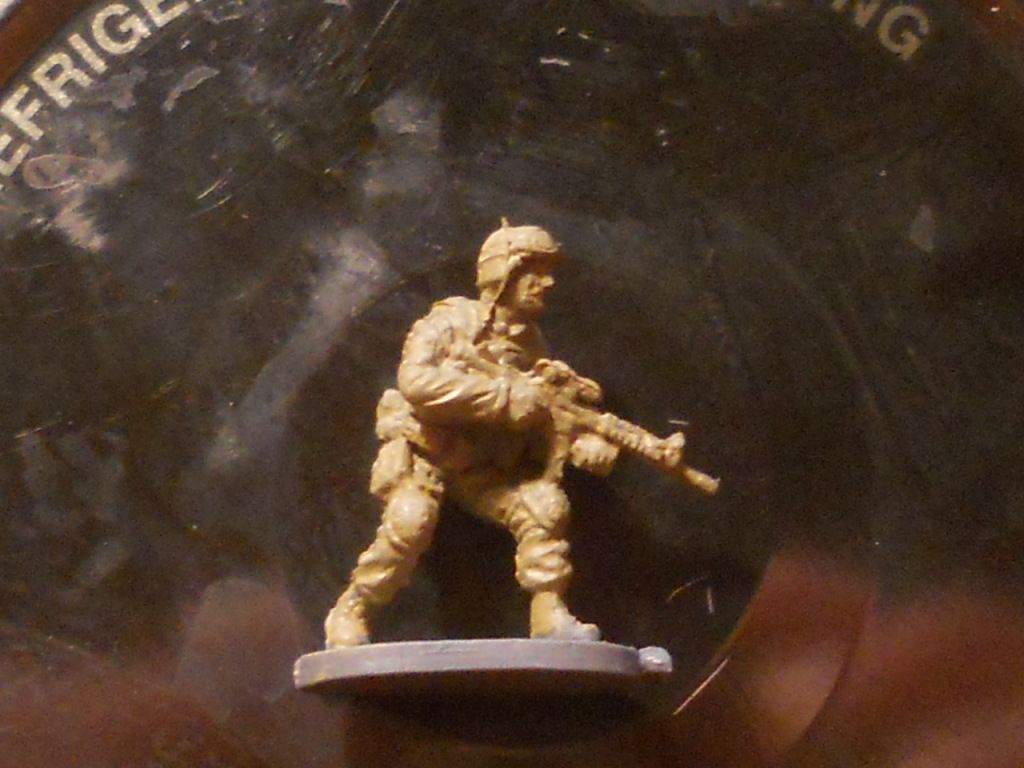
Paint all the figure in the Wood and field grey mix

Image
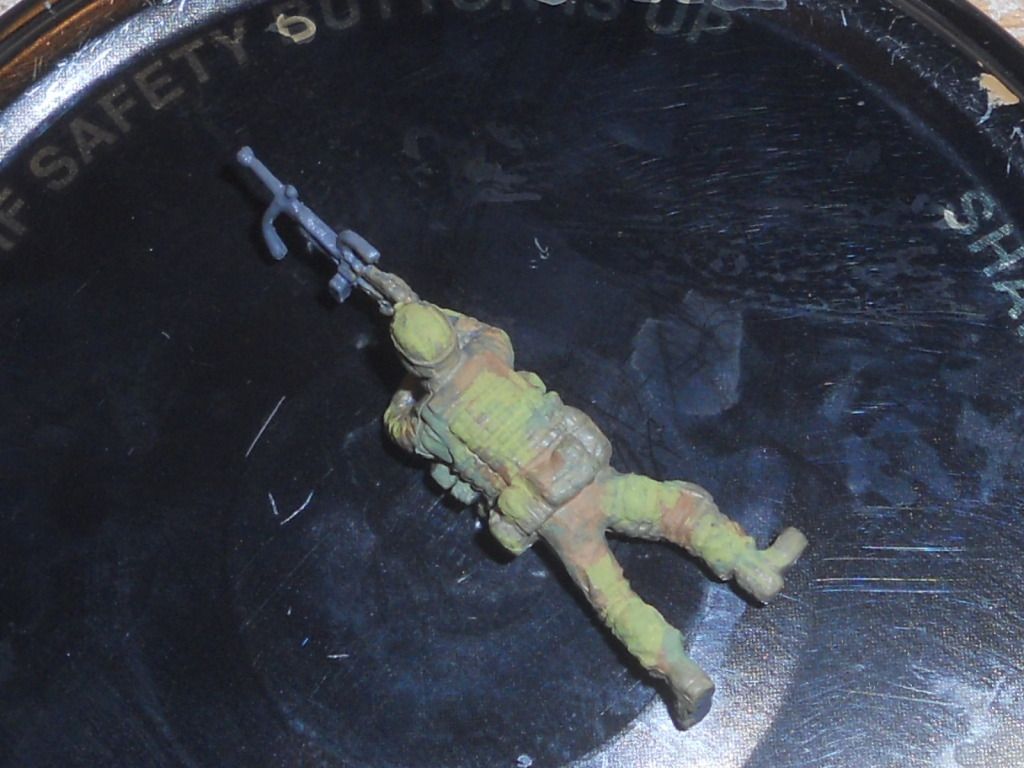
Dabble on the field grey and earth red in about equal amounts. Note: the picture only shows the green

Image
Highlight only the green with the Field grey and yellow mix

Image
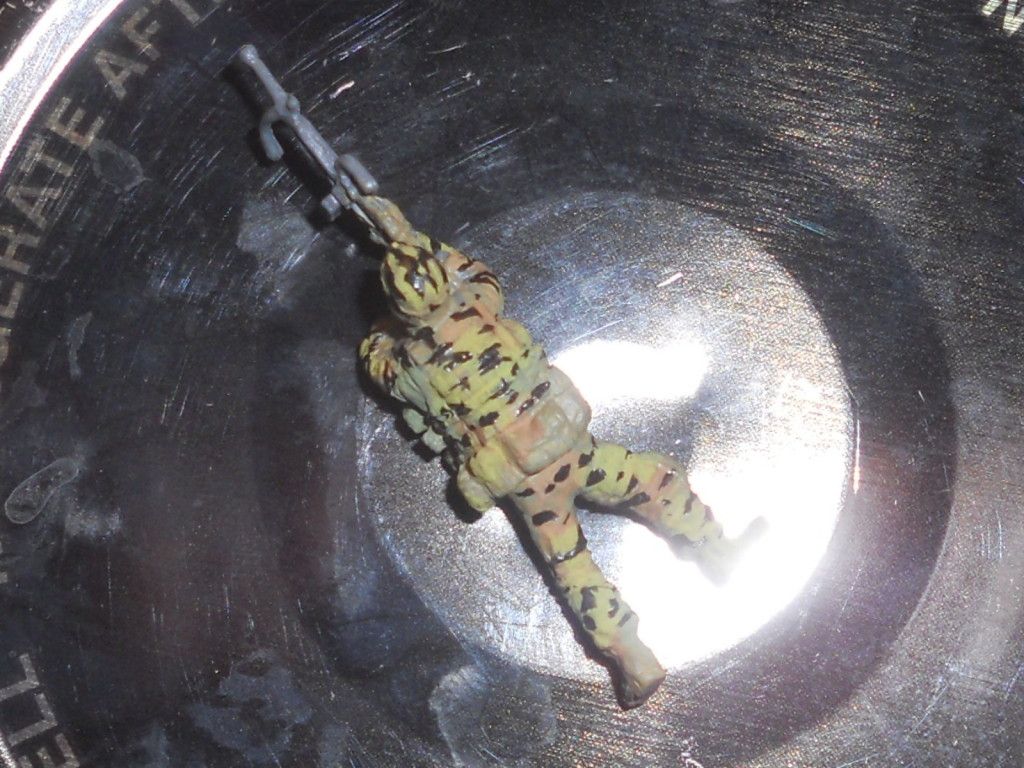
Here is where it begins to look awful but be patient ;-) Add black dashes all over the figure. Look at a good full uniform picture to get the direction of the dashes

Image
Repeat with the flat white

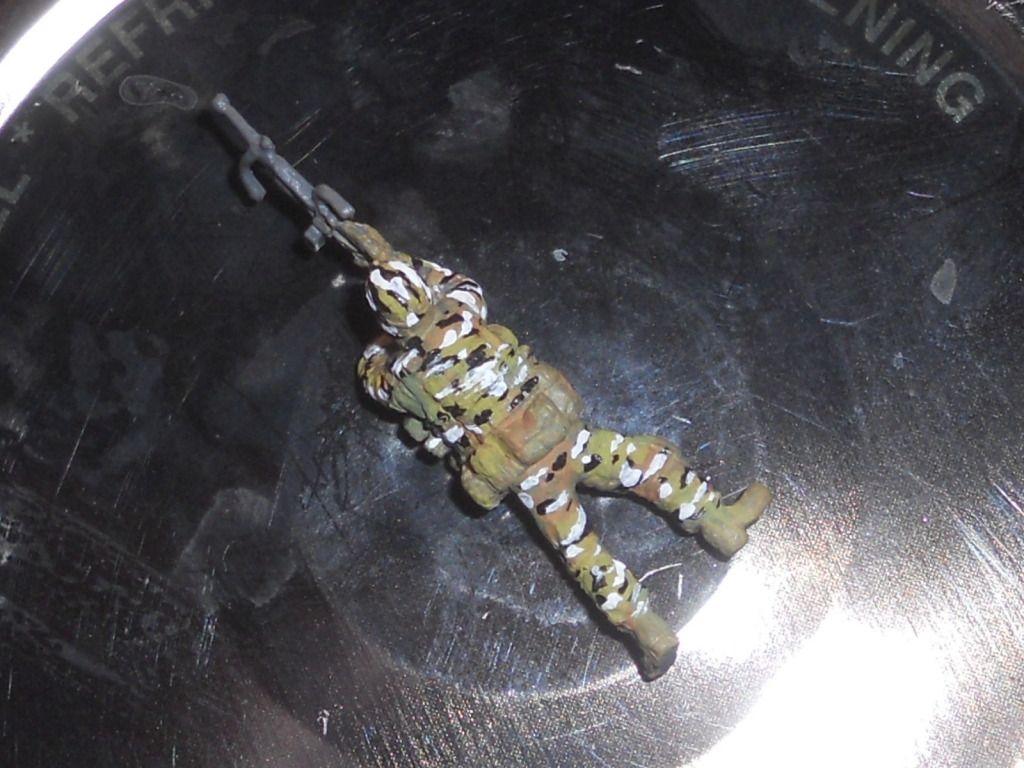
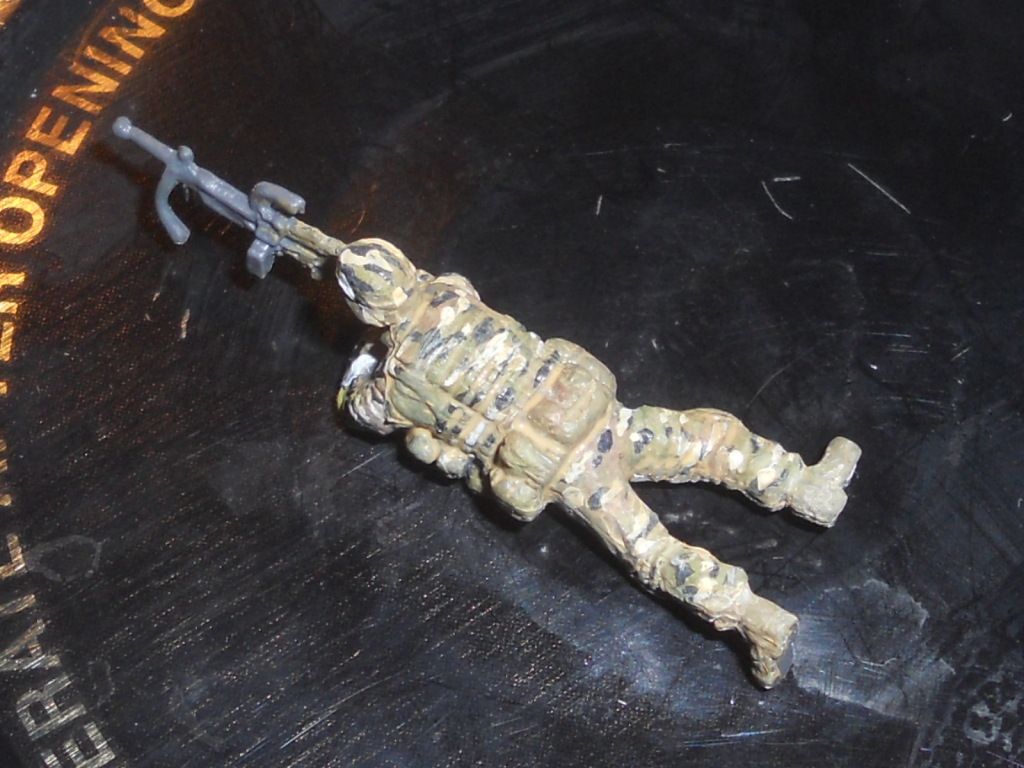
Here is the important part

Make a flat white wash 'till it looks like milk. Cover the entire figure in the mix and dab off the excess with a dry brush
Next make a wash of "wood" color. After the white wash is dry, do the same with the wood wash. Depending on the climate in which the figure is "operating," adjust the amount of wood to make more dust or a lighter shade.
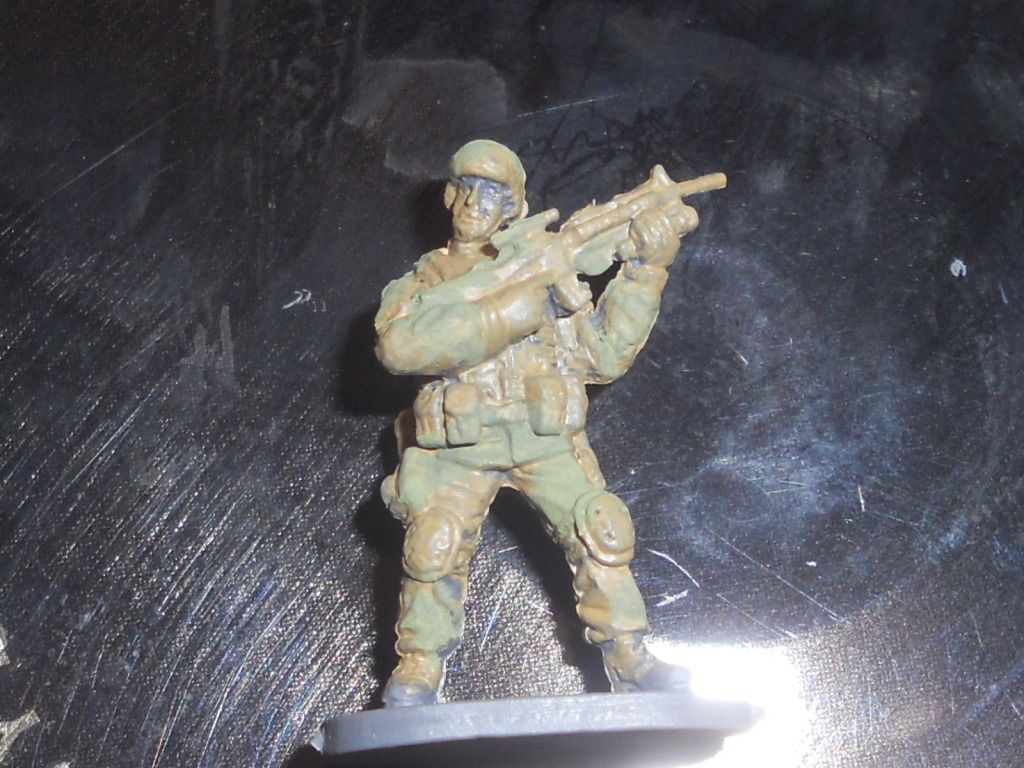
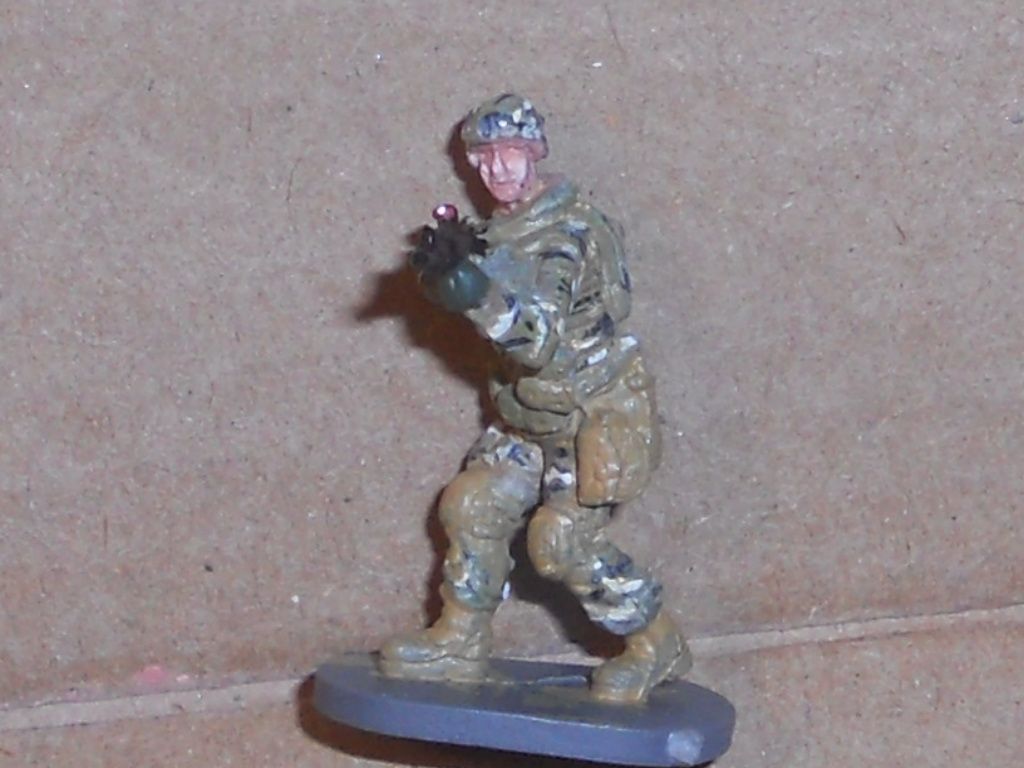
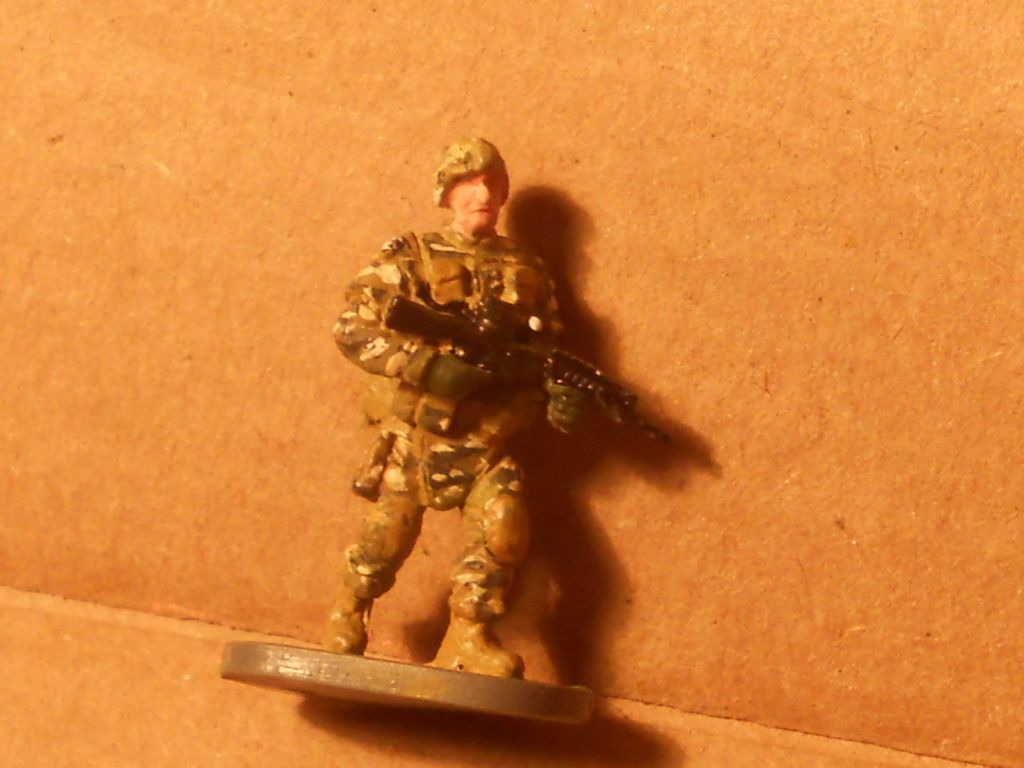
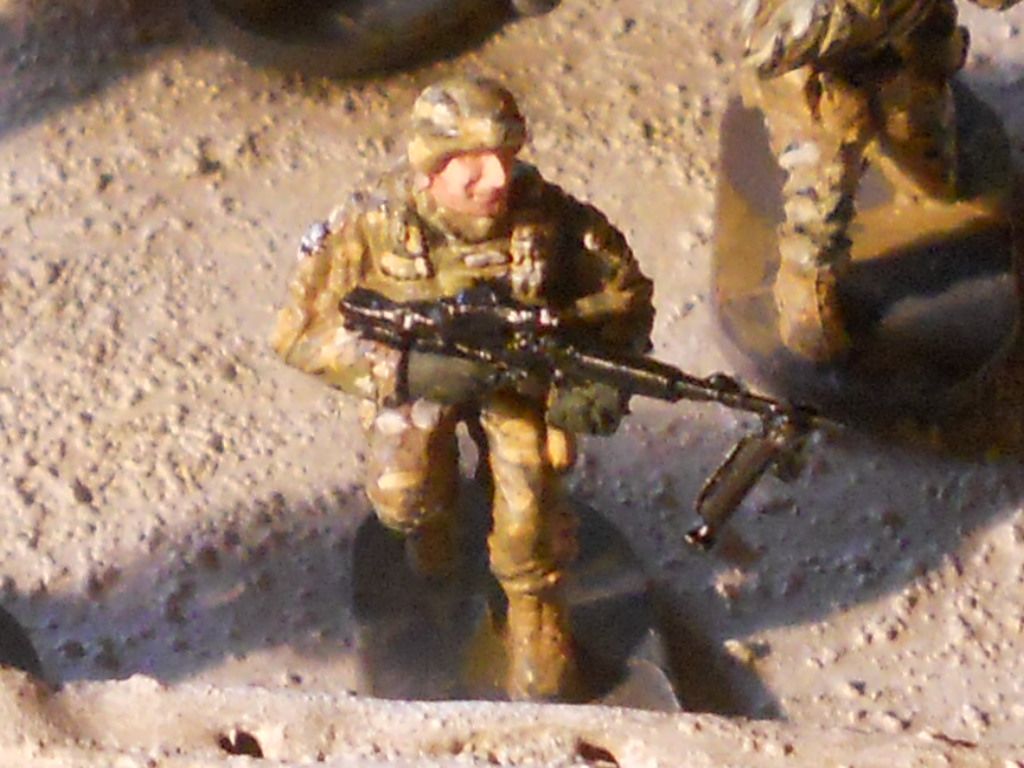
The result

Image
Allow this to dry completely then paint in the rest in your own style

~~~~~~~~~~~~~~~~~~~~~~~~~~~~~~~~~~~~~~~~~~~~~~~~~~~~~~~~~~~~~~~~~~~~~~~~~~~~~~~~~~~~~~~~~~~~~~~~~~~~~~~~~~~~~~~~~~~~~~~~~~~~~~~~~~~~~~~~~~~~~~~~~~~~~~~~~~~~~~~
Image
Image
Image
Image


Thanks. Hope it helps
User avatar
Ben Bob  United States of America
 
Posts: 801
Member since:
28 Jan 2012, 03:22


Posted by mickey mouse on 11 Jul 2012, 06:34

nice tutorial ben bob ;-)
User avatar
mickey mouse  Netherlands
Supporting Member (Gold) Supporting Member (Gold)
 
Posts: 1433
Member since:
24 May 2012, 19:42

Posted by Mai Strac on 11 Jul 2012, 09:58

Thank you very much Ben, for a lovers of modern figs like me your tutorial is highly interesting!!!!!! :thumbup: :thumbup: :thumbup:
I've seen also very interesting conversions from caesar's modern us!!! :love: :love:
User avatar
Mai Strac  Italy
 
Posts: 2538
Member since:
11 Jan 2009, 19:08

Posted by Peter on 11 Jul 2012, 11:09

Nice tutorial Ben :thumbup:
User avatar
Peter  Belgium

Moderator Moderator
 
Posts: 22507
Member since:
25 Mar 2008, 18:51

Posted by poky on 11 Jul 2012, 12:11

very nice tutorial, 1 suggestion instead of pure white and black, light grey and dark grey almost black, I think that does colors are still a bit harsh on the final figures, the wash ideas are brilliant
User avatar
poky  Netherlands
 
Posts: 477
Member since:
22 Oct 2009, 16:00

Posted by Ben Bob on 11 Jul 2012, 17:34

Thanks Mickey and Peter :-)

Mai Strac wrote:Thank you very much Ben, for a lovers of modern figs like me your tutorial is highly interesting!!!!!! :thumbup: :thumbup: :thumbup:
I've seen also very interesting conversions from caesar's modern us!!! :love: :love:


Thanks Mai Strac, I'm glad you found it interesting. As for the conversions; I have recently enjoyed making these guys. Caesar's plastic is a pleasure to paint and convert. The super glue makes an unusually strong bond. BTW the Medium MGs are extras from the Dragon HMMWV set, I cut off the M4 just past the scope and super glued the M240 in place :-)

poky wrote:very nice tutorial, 1 suggestion instead of pure white and black, light grey and dark grey almost black, I think that does colors are still a bit harsh on the final figures, the wash ideas are brilliant


Thanks Poky! I plan on painting a whole platoon of these so I will try some like you said and see what the result is. BTW I looked at your blog, your sculpting is great! The tiny weapons you made are especially well done and impressive
User avatar
Ben Bob  United States of America
 
Posts: 801
Member since:
28 Jan 2012, 03:22

Help keep the forum online!
or become a supporting member

Posted by disgruntledfusilier on 14 Jul 2012, 17:19

Looks Great, Ben! Thanks for the tutorial - I will need to get some of these colors. I wonder how the GW line will work using colors similar to what you used.

I own some Multi-Cam stuff (a boonie hat and some shorts) that I could use for a guide I suppose.

Excellent work (as always) I will continue to tune into your blog and watch your progress.

Steve :mrgreen:

soundofficerscall.blogspot.com
disgruntledfusilier  
 
Posts: 1
Member since:
14 Jul 2012, 17:14

Posted by Ben Bob on 14 Jul 2012, 18:45

Thanks Steven :mrgreen:

I think most paint companies should work fine, especially considering every picture of Multicam I see looks a bit different. Nice to have you here :-)
User avatar
Ben Bob  United States of America
 
Posts: 801
Member since:
28 Jan 2012, 03:22

Posted by Ben Bob on 14 Jul 2012, 18:47

BTW everyone I should have the whole platoon on my blog very soon
User avatar
Ben Bob  United States of America
 
Posts: 801
Member since:
28 Jan 2012, 03:22

Posted by Duke atreides on 15 Jul 2012, 12:50

Very good tutorial!! Thanks!
Duke atreides  Portugal
 
Posts: 624
Member since:
04 Dec 2011, 00:24

Posted by Ben Bob on 17 Jul 2012, 01:46

Duke atreides wrote:Very good tutorial!! Thanks!


Your welcome :-)
Glad you found it helpful.
User avatar
Ben Bob  United States of America
 
Posts: 801
Member since:
28 Jan 2012, 03:22


Return to Tutorials