
Work in Progress
Airfix 1/76 88mm Flak en Sd.Kfz.7 tractor
100 posts
• Page 2 of 5 • 1, 2, 3, 4, 5
This is awesome. I'll follow.
-

Kekso
 Moderator
") Supporting Member (Bronze)
Supporting Member (Bronze) - Posts: 6843
- Member since:
19 Oct 2011, 18:32
Dear Huib,
Ik just had a look at my own Flak :
http://bennosfiguresforum.com/viewtopic.php?f=2&t=23042&p=253017&hilit=dykio#p253017
and then at yours.....and then again at mine and yours... and mine and yours....well you get the point.
I just cant find it possible that you have upgraded that kit to such an incredible level. You realy are a scratch-MASTER
Brilliant
Regards
Dykio
-

dykio
- Posts: 1503
- Member since:
31 Jan 2008, 19:56
Ugh, huib, you are a master at turning an initial thing into something totally different. 
I love all your perfect conversions of military vehicles.
My best regards.
Santi.
I love all your perfect conversions of military vehicles.
My best regards.
Santi.
-

Santi Pérez
- Posts: 1876
- Member since:
28 Aug 2016, 19:42
-

Kostis Ornerakis
In memoriam- Posts: 1280
- Member since:
14 Feb 2016, 18:16
Thank you very much guys, for your very kind comments!
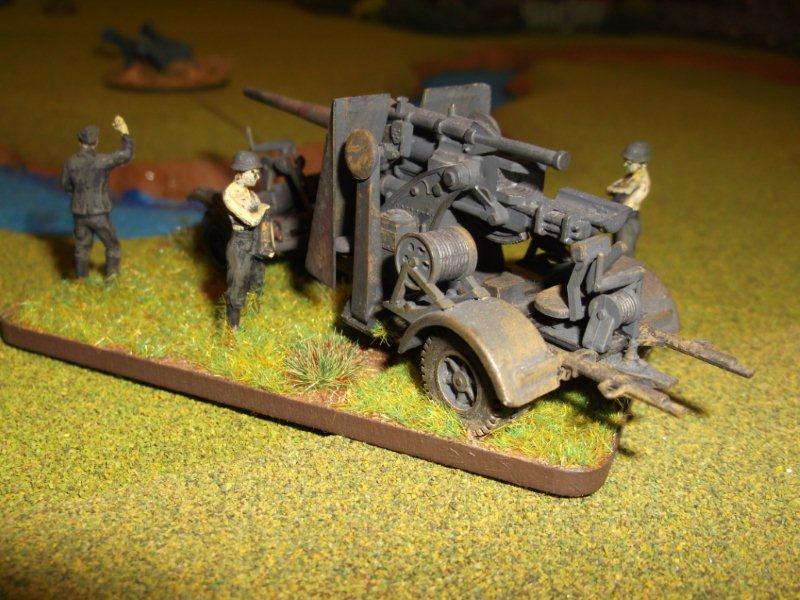
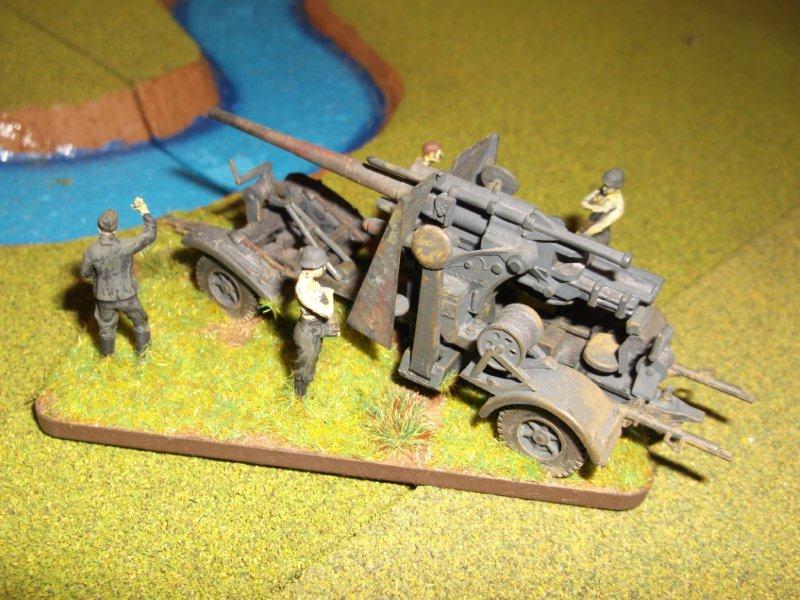
Gun cradle
So, let's go on with the upper part of the 88mm gun.

Airfix's main parts. Some mould seams, extractor pin marks and a bit of flash. Some of the parts are well detailed, others are a bit course and shapeless.

The gun cradle constructed. Some detail was added, like on the automatic fuse setter.

The other side. Detail was quite well done by Airfix, including the handwheels and the foldable seat. I only added the azimuth and elevation indicators for a Flak 37, and the mechanical rod between the elevation indicator and the direct fire sight.

The shield is too thick and has ejector pin marks.

It was sanded thinner, especially on the edges, to create a more realistic visual effect. And a bit of detail was added.

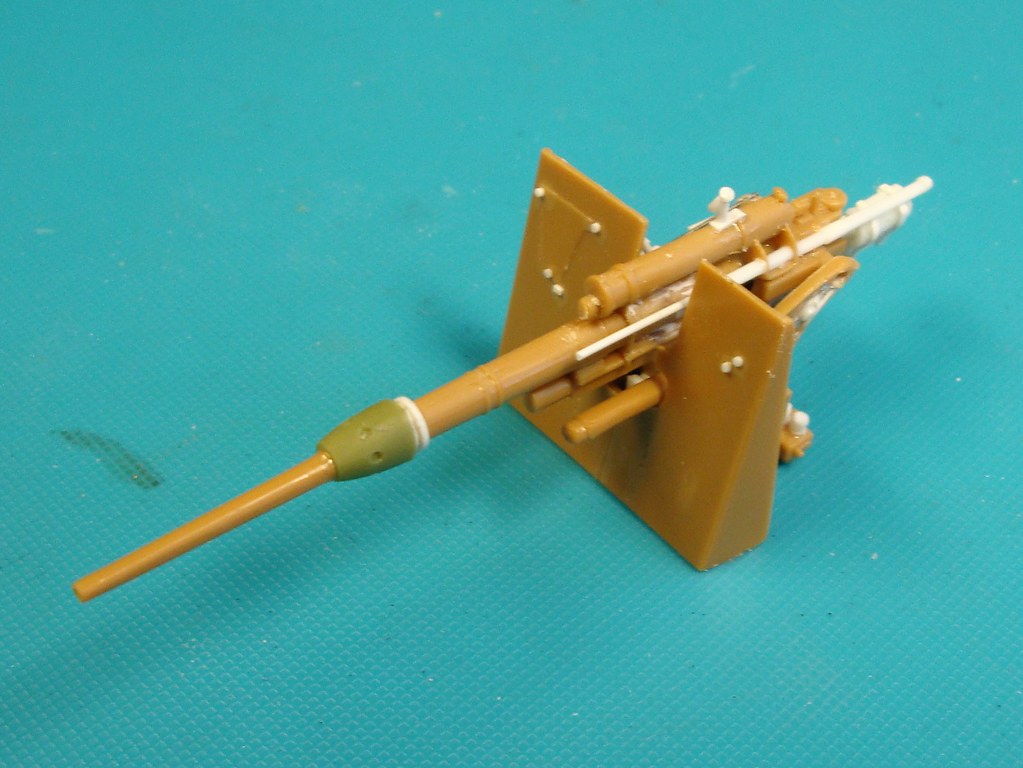
The gun shield attached to the cradle. Some detail on the front of the shield.

On the backside the support struts were added with which the shield is leaning on the cradle.

From the other side, showing the automatic fuse setter.
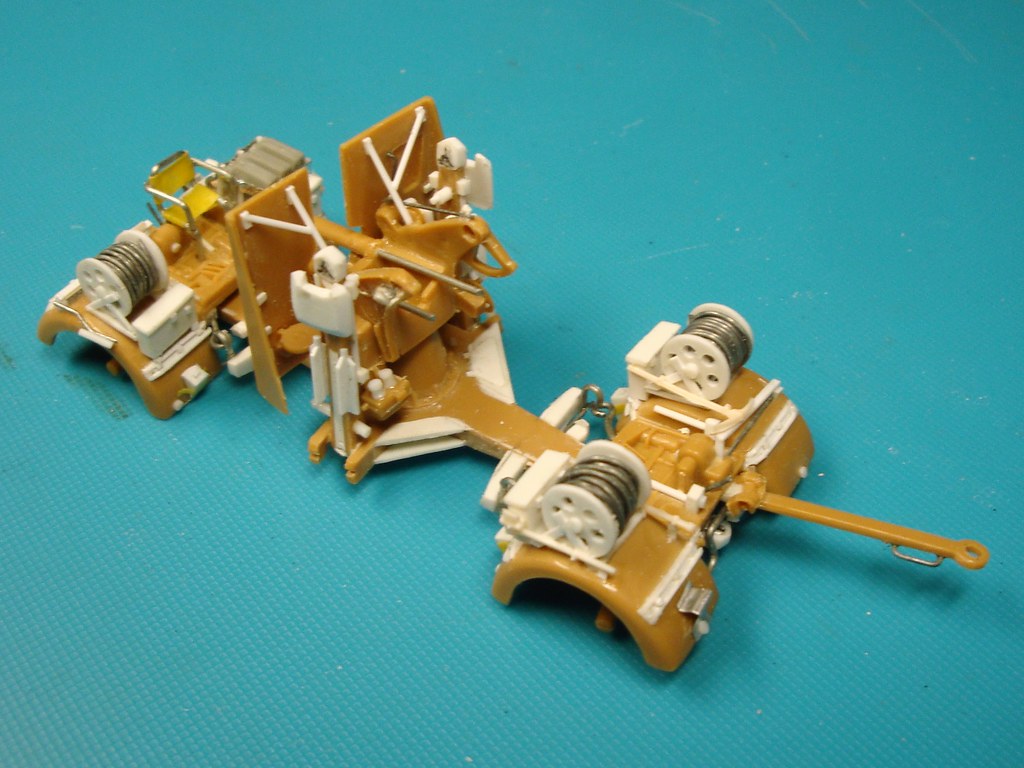
On the cruciform mount, just for the picture. Starts looking nicely complex!
Now for the gun barrel.
Gun cradle
So, let's go on with the upper part of the 88mm gun.
Airfix's main parts. Some mould seams, extractor pin marks and a bit of flash. Some of the parts are well detailed, others are a bit course and shapeless.
The gun cradle constructed. Some detail was added, like on the automatic fuse setter.
The other side. Detail was quite well done by Airfix, including the handwheels and the foldable seat. I only added the azimuth and elevation indicators for a Flak 37, and the mechanical rod between the elevation indicator and the direct fire sight.
The shield is too thick and has ejector pin marks.
It was sanded thinner, especially on the edges, to create a more realistic visual effect. And a bit of detail was added.
The gun shield attached to the cradle. Some detail on the front of the shield.
On the backside the support struts were added with which the shield is leaning on the cradle.
From the other side, showing the automatic fuse setter.
On the cruciform mount, just for the picture. Starts looking nicely complex!
Now for the gun barrel.
-

huib
- Posts: 962
- Member since:
12 Dec 2015, 15:57
That is incredible. It must be forty plus years since I made one of these, perhaps more. I don't think I would ever have seen the potential in the kit that you have brought out of it, just this far. You, sir, have my utmost admiration.
-
steve_pickstock
- Posts: 1311
- Member since:
20 Jun 2010, 19:56
Help keep the forum online!
or become a supporting member
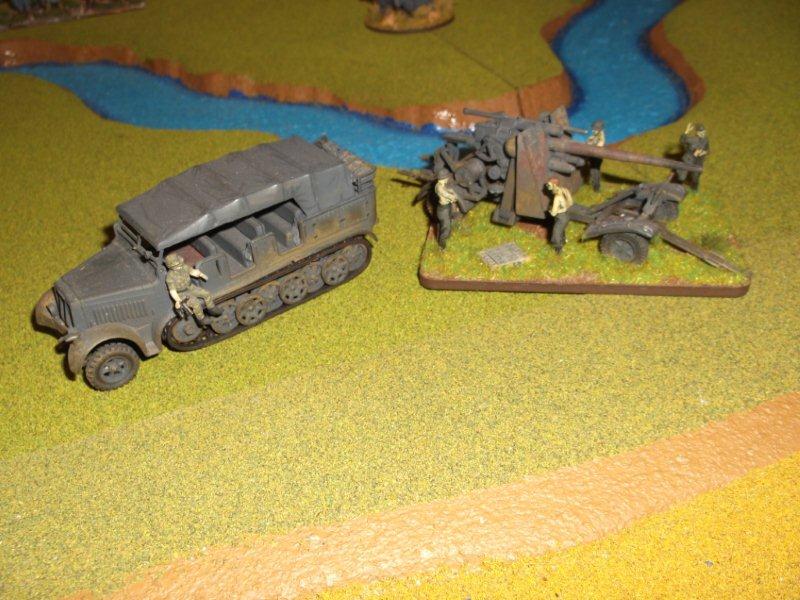
Brilliant work, much nicer than the crude versions inhabiting my wargames table.
-
Fire at Will

- Posts: 760
- Member since:
16 Dec 2009, 16:21
That's given me an idea Will. When huib's finished his masterclass we should all post a piccy of the 88s in our collection. Then we'd really see wot's possible when a master-modeler gets stuck into a forty year old kit!
I remember graduating from the Airfix kit to the Hasegawa Tractor and 88, and thinking how vastly superior the Hasegawa kit was...
well it's very inferior to huib's Airfix model!

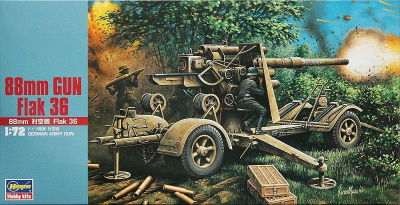

I remember graduating from the Airfix kit to the Hasegawa Tractor and 88, and thinking how vastly superior the Hasegawa kit was...
well it's very inferior to huib's Airfix model!
-

Harry Faversham
- Posts: 561
- Member since:
16 Nov 2013, 13:56
Built this the summer of 1974, thought it was the dog's back then, compared to Airfix. Recently re-based with proper gun's crew added.

-
Harry Faversham
- Posts: 561
- Member since:
16 Nov 2013, 13:56
But rather than hijack Hulb's thread, would it not be better to post in a separate thread?
-
steve_pickstock
- Posts: 1311
- Member since:
20 Jun 2010, 19:56
steve_pickstock wrote:But rather than hijack Hulb's thread, would it not be better to post in a separate thread?
OK, I've set up a thread here so people can submit their earliest models
http://bennosfiguresforum.com/viewtopic.php?f=2&t=25553
-
Fire at Will
- Posts: 760
- Member since:
16 Dec 2009, 16:21

Thank you, guys! Yes, I have the Hasegawa 88mm in my stash too. It´s a nice kit of the early model Flak 18. No problem posting other 88´s in my thread. These are interesting sources of inspiration.
And I want to add that building a model for wargaming is not the same as superdetailing a model. Wargaming models must be sturdy and compact to enable the continuous handling. It´s a completely different style of modelling. So do not apologize yourselves if all your well built and well painted 88mm´s are not so detailed as mine.
And I want to add that building a model for wargaming is not the same as superdetailing a model. Wargaming models must be sturdy and compact to enable the continuous handling. It´s a completely different style of modelling. So do not apologize yourselves if all your well built and well painted 88mm´s are not so detailed as mine.
-
huib
- Posts: 962
- Member since:
12 Dec 2015, 15:57
Gunbarrel

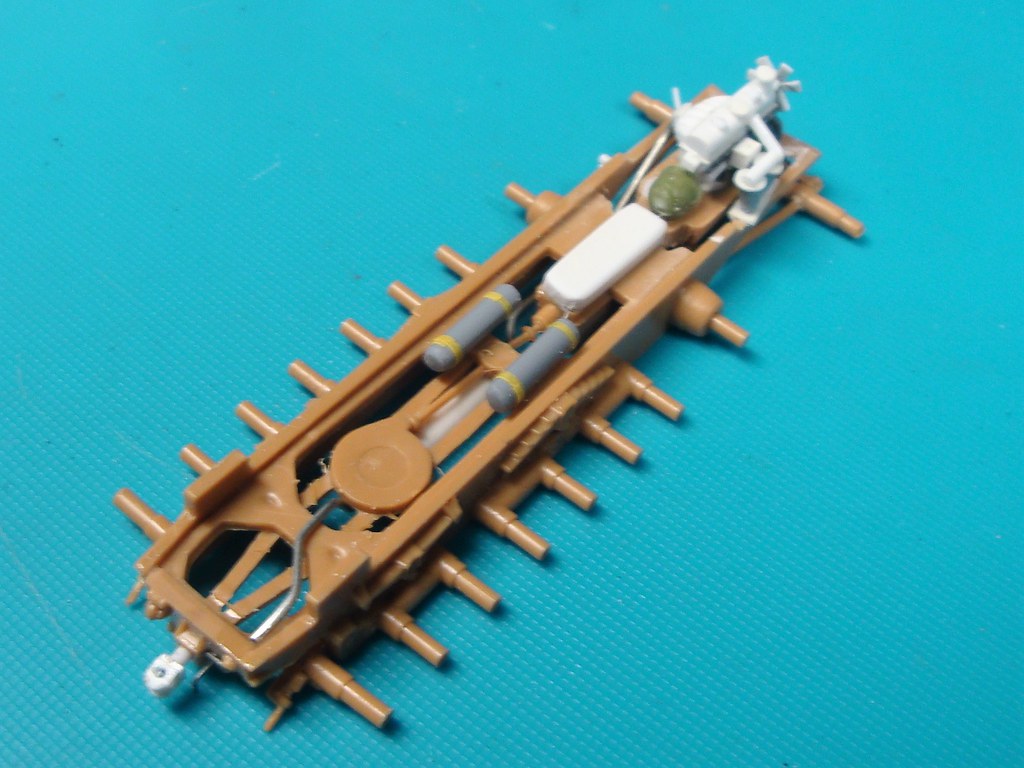
The gunbarrel, including recoilcilinders: Some ugly extractor pin marks on nasty positions!

Extractor pin marks removed as good as possible. Next I cut the barrel in four parts.

The Flak 36/37 had a three piece barrel to facilitate easier replacement after wear. The green part is a sleeve to unscrew part of the barrel. Furthermore the cradle of the barrel was replaced by a more realistic hollow homemade part. The piece of wiring is to strongly connect the three pieces of the barrel.

The new assembly further detailed. On the left side of the barrel the semi-autoloader mechanism.

The other side, with on top of the barrel the periscopic roundview optics.
On the gunmount
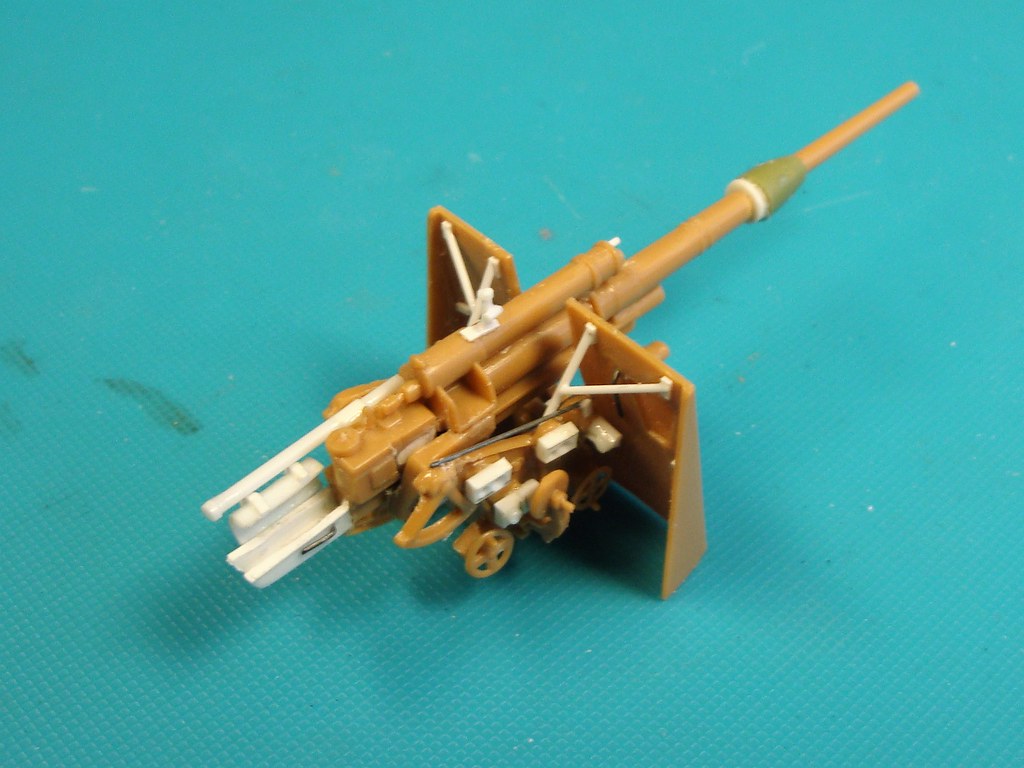
From the other side.

And now on the cruciform.
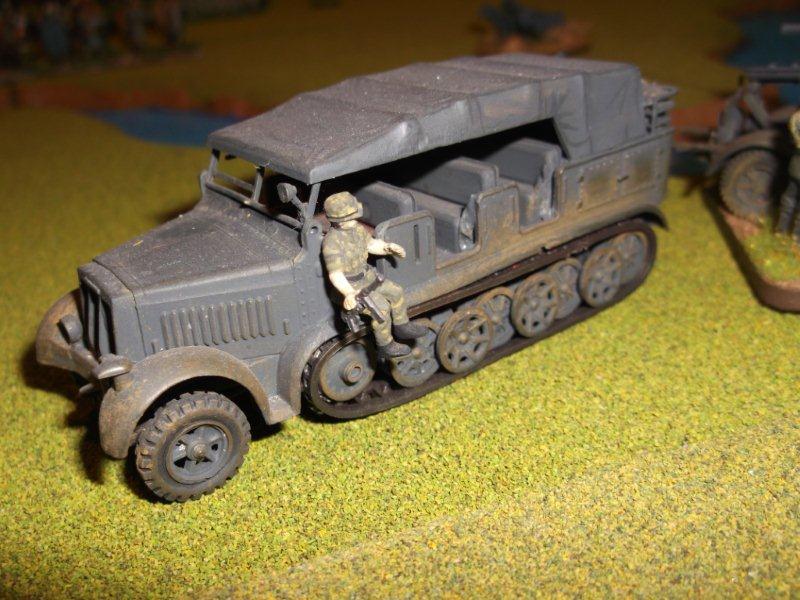
And now lets have a look at the Sd.Kfz.7 tractor.
The gunbarrel, including recoilcilinders: Some ugly extractor pin marks on nasty positions!
Extractor pin marks removed as good as possible. Next I cut the barrel in four parts.
The Flak 36/37 had a three piece barrel to facilitate easier replacement after wear. The green part is a sleeve to unscrew part of the barrel. Furthermore the cradle of the barrel was replaced by a more realistic hollow homemade part. The piece of wiring is to strongly connect the three pieces of the barrel.
The new assembly further detailed. On the left side of the barrel the semi-autoloader mechanism.
The other side, with on top of the barrel the periscopic roundview optics.
On the gunmount
From the other side.
And now on the cruciform.
And now lets have a look at the Sd.Kfz.7 tractor.
-
huib
- Posts: 962
- Member since:
12 Dec 2015, 15:57
-

MABO
") Supporting Member (Gold)
Supporting Member (Gold) - Posts: 9146
- Member since:
12 May 2008, 18:01
Thanks, MABO!
Sd.Kfz.7 chassis
The next step in the building process is the Sd.kfz.7 tractor. I'll make a start with the chassis.

The kit parts.

I removed some plastic to create a bit of space around the engine.

Assembled.

Quite adequate and nicely done by Airfix in 1967! I'm not going to change a lot.

Some pieces of styrene for the engine.

Cilinderbloc with head.

Glued on the chassis and elaborated with manifold, exhaust pipe, ventilator, air ducts, etc. And the steering rod in front.

Carburattor and airfilters. The green blob is the clutch house. And a new towing hook at the back.

On the bottom an exhaust pipe with muffler. Later I found out the muffler is in the center and not to the right of the chassis. OK, I'll think about it.
Now on with the body.
Sd.Kfz.7 chassis
The next step in the building process is the Sd.kfz.7 tractor. I'll make a start with the chassis.
The kit parts.
I removed some plastic to create a bit of space around the engine.
Assembled.
Quite adequate and nicely done by Airfix in 1967! I'm not going to change a lot.
Some pieces of styrene for the engine.
Cilinderbloc with head.
Glued on the chassis and elaborated with manifold, exhaust pipe, ventilator, air ducts, etc. And the steering rod in front.
Carburattor and airfilters. The green blob is the clutch house. And a new towing hook at the back.
On the bottom an exhaust pipe with muffler. Later I found out the muffler is in the center and not to the right of the chassis. OK, I'll think about it.
Now on with the body.
-
huib
- Posts: 962
- Member since:
12 Dec 2015, 15:57
Help keep the forum online!
or become a supporting member
Chassis (2)
The exhaust muffler being not in the middle, as it should be, kept itching my mind.

So I changed it. Better like this.
And I used to opportunity to add a few improvements: The gearbox is heighthened, and two compressed air cilinders for the track steering system were added.

I also made a little start with the body. This is the main part straight from the box.

I opened up the engine compartment.

Testfit of the body on the chassis: yes, it fits! No on with building the body.
The exhaust muffler being not in the middle, as it should be, kept itching my mind.
So I changed it. Better like this.
And I used to opportunity to add a few improvements: The gearbox is heighthened, and two compressed air cilinders for the track steering system were added.
I also made a little start with the body. This is the main part straight from the box.
I opened up the engine compartment.
Testfit of the body on the chassis: yes, it fits! No on with building the body.
-
huib
- Posts: 962
- Member since:
12 Dec 2015, 15:57
huib wrote:Quite adequate and nicely done by Airfix in 1967! I'm not going to change a lot.
Lovely work sir.
-
steve_pickstock
- Posts: 1311
- Member since:
20 Jun 2010, 19:56
Thank you, Steve!
Bodywork (1)
After the chassis, now its time for the body.

The kit mainparts.
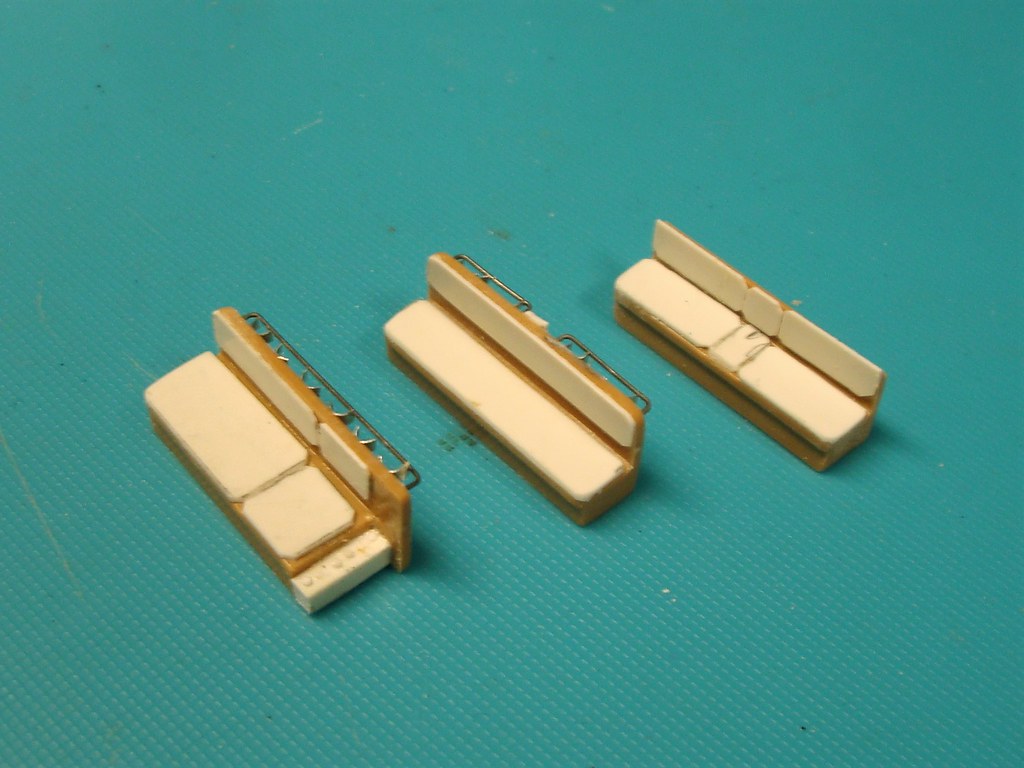
First I started enhancing the quite spartan Airfix benches with soft cushions for tender soldiersbutts.

And the backsides were decorated with handrails and rifleclips.

Handrails on the sides to help the soldiers climb in.

The body constructed. Handbreak and gearsticks added. The sides of the engine compartment remain open to enable extra fresh air in the desert heat. That's why I made an engine.

I cut of the luggagerack on the back to enable some filling and sanding.

After some sanding the benches were placed.
The interior is ready now apart from the steering wheel and axle, which have to wait for the driver figure.
Now on with further building up and detailing the outside of the body.
Bodywork (1)
After the chassis, now its time for the body.
The kit mainparts.
First I started enhancing the quite spartan Airfix benches with soft cushions for tender soldiersbutts.
And the backsides were decorated with handrails and rifleclips.
Handrails on the sides to help the soldiers climb in.
The body constructed. Handbreak and gearsticks added. The sides of the engine compartment remain open to enable extra fresh air in the desert heat. That's why I made an engine.
I cut of the luggagerack on the back to enable some filling and sanding.
After some sanding the benches were placed.
The interior is ready now apart from the steering wheel and axle, which have to wait for the driver figure.
Now on with further building up and detailing the outside of the body.
-
huib
- Posts: 962
- Member since:
12 Dec 2015, 15:57
-
Harry Faversham
- Posts: 561
- Member since:
16 Nov 2013, 13:56
100 posts
• Page 2 of 5 • 1, 2, 3, 4, 5