Why don't you use paper tissues soaked in thinned down woodglue for the cloaks? Now it looks very heavy indeed.

Work in Progress
Musketeers WIP
Great progress on the animals, and the chickens of course! I also like those stands you made for them. 
Why don't you use paper tissues soaked in thinned down woodglue for the cloaks? Now it looks very heavy indeed.
Why don't you use paper tissues soaked in thinned down woodglue for the cloaks? Now it looks very heavy indeed.
-
Santi Pérez likes this post. •
- Reply
-

Peter
 Moderator
- Posts: 22516
- Member since:
25 Mar 2008, 18:51
I missed some of the new steps for some days, but I am happy to return, when the streets are crowded with nicely painted animals. They look very cool in the scenery.
Concerning the cloak, I would support Peters idea. But who am I to talk about sculpting ...
Concerning the cloak, I would support Peters idea. But who am I to talk about sculpting ...
-

MABO
") Supporting Member (Gold)
Supporting Member (Gold) - Posts: 9146
- Member since:
12 May 2008, 18:01
I seemed somehow too have missed this topic.
Interesting stuff and the animals are great.
The finale will be spectacular I feel.
Best wishes,
Chris
Interesting stuff and the animals are great.
The finale will be spectacular I feel.
Best wishes,
Chris
-
C M Dodson

- Posts: 2572
- Member since:
01 May 2015, 18:48
Chariobaude wrote:i just can't say how fan i am of this project ! ...and iwant more pictures of the place centrale!
Me too. Every new post add more expectation and satisfaction for all of us, your followers.
Great work, Steve.

Santi.
-
steve_pickstock likes this post. •
- Reply
-
Santi Pérez
- Posts: 1876
- Member since:
28 Aug 2016, 19:42
There may be more on the way - I found another box while i was looking for something else, but I may save them for another project.Peter wrote:Great progress on the animals, and the chickens of course! I also like those stands you made for them.
Peter wrote:Why don't you use paper tissues soaked in thinned down woodglue for the cloaks? Now it looks very heavy indeed.
Put simply, I am more comfortable with this.
I have found that the tissue paper method ends up giving me too many small wrinkles.
A few years ago Hat Industry was trying out illustrators for box art, and he put up samples from one guy and the big issue for a lot of people was the folds and winkles. The illustrator persisted in painting in too many small wrinkles so that the figures looked like they were wearing silk or a thin man-made fabric instead of a heavy wool or serge. These materials - especially the wool, tend to fold in smooth large folds, so I prefer thinly rolled putty, shaped and rolled round a cocktail stick or a paint brush handle.
Having said that, the Miliput I used on the figures in my previous post was awful - it was old, it was crusty and didn't set properly. I had to redo the half cloak completely.
The half cloak figure
I'm not a great fan of half-cloaks, I prefer my cloak to come down to about the level of my calves, the same as the cloaked figure I used as Cyrano de Bergerac. There doesn't seem to be much point then otherwise. (In fact I still don't understand why we don't still wear them.)
Half-cloaks can be worn in one of two ways, either sitting on both shoulders (like Batman or Superman) or they can be worn so that the tie cords go over one shoulder, and across the chest and under the armpit of the other shoulder and then they're tied on the chest. In the case of my figure it goes over the left shoulder and under the right arm.

Having redone the miliput and re-shaped it, and left it to go off over night, I came back with a sharp knife and trimmed and sanded and filed the edges to clean it up. Once the surface was clean, a little more trimming and sanding, and I was happy with it.
It was painted to match the original picture, so Vallejo Scarlet with various earth tones to lighten the colour and acheive a sort of 'pink velvet' effect (don't ask).


Pretty bad picture - I'm sorry, but the figure looks alright. He will go into the Roaring boys & Bravos group (young men out on the town, with their best clobber on, and bags of attitude.
The person who inspired this, was really happy with it and is telling people that he now has his own action figure!
What I am aiming for with the thrown cloak, is for it to look like the swordsman has swung the cloak around and out to the left, giving it room to spread out as he throws it. He then brings it around onto his opponent.
That's the plan anyway!


The issues with the Miliput were resolved by painting the surface with UV cured resin, (you can see the light reflected on the resin in some of the pictures) which allowed me to shape and sand it, to thin out the edges and shape some of the curved shapes better. The resin also acted to bond the Miliput to the figure better - the cloak kept rotating around the figures arm.
Here he is with a coat of paint - he is going to have a white doublet, white scarf (sash) and dark blue breeches.


I think the cloak will either be a light grey or a mustard colour eventually, the brown just isn't working for me.
Eventually I went with an off-white for the coat, using a thinned 50/50mix of white and Desert Yellow, over the base coat which had had a coat of the dirty wash -in effect it was pre-shaded. From there I worked the coat up to pure thin white. I did something similar with the scarf (sash), started with a thinned 50/50 blue/white mix, then lightened that up to nearly pure white. The idea was to get two different shades of white so that they didn't blend into each other visually.
The cloak started as Desert Yellow, shaded up with white, with edge highlights of an almost white shade.
The breeches - blue with white decoration and all the rest is pretty staright forwards.
He'll do. I'm happy.


I will fill that gap under his base with superglue and baking powder.
This week I have also been digging around looking to see if I actually have one of the IMEX Pilgrim sets. There is a lot in that set that I have problems with, it's a very stylised view of the pilgrims, but there are some figures that I can work with. Couldn't find one, so I guess I will have to order one.
What I did find was more of the IMEX battlefield accessories, a box of Pegasus Animals, a couple of sprues from the Revell 30YW Swedish Artillery, some of the Italeri Napoleonic Artillery horses - a whole load of useful stuff, but no Linear A Roman Senators (damn!).
The two main things I found were a box of the Hat Pontoons and wagon - why that is useful will be apparent in a moment, and the Orion Hussites and their wagon.
I need more wagons for the street scenery.
Referring to Eduard Wagner's European Weapons and Warfare 1618-1648, the section on transport includes these illustrations.


And these coaches.

( I did find an IMEX Stagecoach but the differences are too great for me to use it as is, and I do have a coach somewhere but I think I might have to make a new one.
If you look, you will note that the bottom central image of the second picture shows a pontoniers cart, so I will probably do one of those, using the limber from the 30YW Swedish Artillery set..
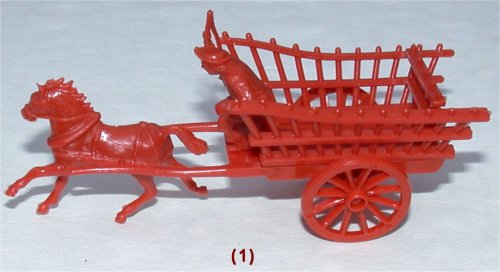
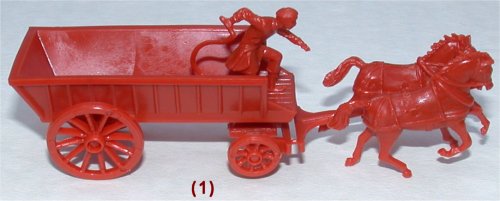
The first picture from Wagner shows a series of high-sided carts with a side ramp - a bit like this:-

from the Orion set.
I reckon it is close enough. I will add some hoops to support the canvas tilt, (and I may use tissue paper for that,
 ), throw some stuff in the back and set it on a base like the hay wagon.
3 days Later
This is one b!tch of a kit
One of the two front wheels shot off into the parts-eating carpet, that took nearly an hour to find, and then only because I was looking for another part. At one point I was going to use two wheels from a Strelets set, but then the missing wheel turned up.
I drilled the top edge of the body rim, and added the hoops for the tilt out of styrene rod. The fact they aren't even in height isn't an issue, and I will be using a tissue of some description to make the tilt itself.

The under-carriage with the Strelets wheels.


It doesn't look too bad, it will certainly do as scenery.
I am so glad that people enjoy this thread, thank you all for your kind words, it keeps me going on this.
Stay safe all, Pickers.
(52859)
-
steve_pickstock
- Posts: 1311
- Member since:
20 Jun 2010, 19:56
This conversion looks very convincing. Although I have been pondering on how to create suitable baggage wagons and other 'transport' for me C17th TYW and C18th WoSS collections, I had not even considered the Hussite wagon in the Orion set as one of the basic vehicles.... so this is an inspired idea! Thank you.
I have various IMEX wheeled wagons and carts, and while these have potential the wheels in each case are too narrow and 'flat' to look convincing as the heavy wheels that tended to characterise earlier vehicles. I am currently considering using Mars or Zvezda artillery sets to provide wheels for (converted) IMEX wagons, but this project is only at the 'thinking' stage and no IMEX wagon has yet been 'under the modelling knife' so to speak.
I will continue to watch this fascinating project with interest.
-
Santi Pérez likes this post. •
- Reply
-
Minuteman
- Posts: 1141
- Member since:
06 Mar 2020, 21:38
Help keep the forum online!
or become a supporting member
Thanks for clearing out the cloak issue. Now I understand why you do it this way with the putty!.
Great work so far on the wagon!
Maybe another wagon that could be interesting for your project:
or this one:
Both from the Waterloo playset.
Great work so far on the wagon!
Maybe another wagon that could be interesting for your project:
or this one:
Both from the Waterloo playset.
-
Santi Pérez likes this post. •
- Reply
-
Peter
- Moderator
- Posts: 22516
- Member since:
25 Mar 2008, 18:51
Peter wrote:Thanks for clearing out the cloak issue. Now I understand why you do it this way with the putty!.
Great work so far on the wagon!
Maybe another wagon that could be interesting for your project:
or this one:
Both from the Waterloo playset.
I picked up this set in a Bring & Buy at a show in Crewe a few years ago. Sadly neither cart was complete. Which was okay as there was enough of the first cart to work with.


It's a very useful model of a hay-cart.
I couldn't use the second one.
I did look at the Strelet R carts from the various 'transport' sets, but to my mind they were designed by someone who has never actually looked at a cart. I mean looked properly.
And don't start me on these models that use 'solid log wheels'!
Wheelwrights have been making wheels since before the Bronze Age - they were experts (there are chariot wheels from Britain that were made with the rim being made from one single piece of bent wood) and their work was widely available. Solid log wheels were the last resort.
-
steve_pickstock
- Posts: 1311
- Member since:
20 Jun 2010, 19:56
Your wagon looks very nice.
The Airfix hay cart is ok but the other is in my opinion not convincing.
The chap standing thrashing his horse seems a bit bonkers too.
However, chop him in half and he could be a coachman.
Best wishes,
Chris
The Airfix hay cart is ok but the other is in my opinion not convincing.
The chap standing thrashing his horse seems a bit bonkers too.
However, chop him in half and he could be a coachman.
Best wishes,
Chris
-
C M Dodson
- Posts: 2572
- Member since:
01 May 2015, 18:48
This is what you need accumulated over a number of years
and my conversion of a TYW gun carriage and limber to produce a carriage
and my conversion of a TYW gun carriage and limber to produce a carriage
-
Fire at Will
- Posts: 760
- Member since:
16 Dec 2009, 16:21
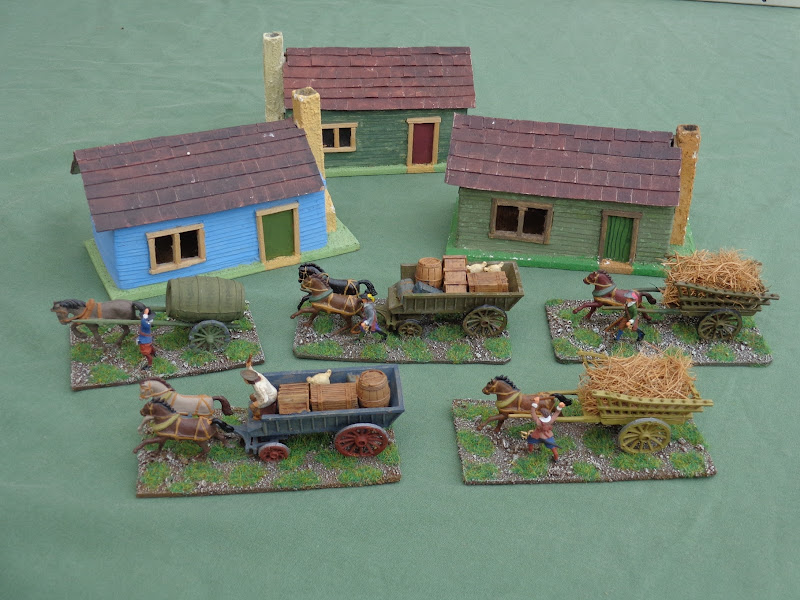
Great progress on this project. Your buildings look good individually but brought together in a streetscape they are fabulous!
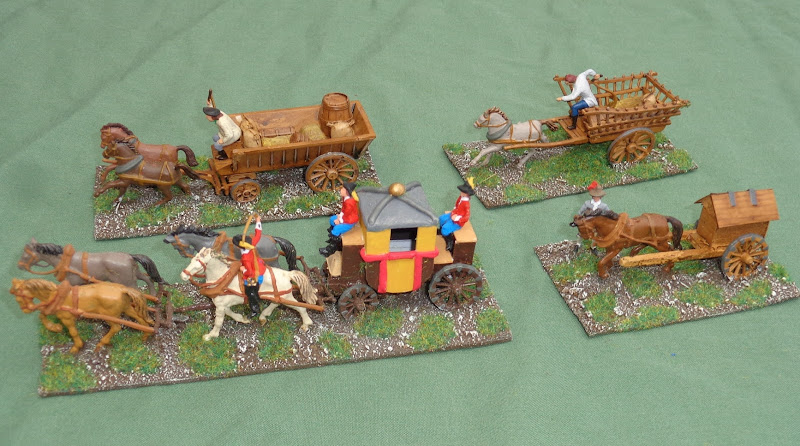
Your Musketeers are all very elegant, the paint job on the cows is terrific, and I love the silvered wood effect on the hay wain; I also like the way it's sitting in the street like a prop, waiting to play a leading role in that tipping cart scene you get in every movie swordfight.
I'd like to copy the sivered wood effect on the hay wain if I can, but mine will have to have Fred Flintstone, solid log, wheels; the spoked wheels were commandeered for Boudica's chariot.
The standing figure is kind of weird but the seated one is at least wearing a good depiction of the smock and broad brimmed hat that were typical for 18th & 19th Century wagoners. I think he might not look too far amiss back in the Medievel period as well. Useful figure.
Your Musketeers are all very elegant, the paint job on the cows is terrific, and I love the silvered wood effect on the hay wain; I also like the way it's sitting in the street like a prop, waiting to play a leading role in that tipping cart scene you get in every movie swordfight.
I'd like to copy the sivered wood effect on the hay wain if I can, but mine will have to have Fred Flintstone, solid log, wheels; the spoked wheels were commandeered for Boudica's chariot.
Peter wrote:@Chris: don't mention the drivers. They are weird.
The standing figure is kind of weird but the seated one is at least wearing a good depiction of the smock and broad brimmed hat that were typical for 18th & 19th Century wagoners. I think he might not look too far amiss back in the Medievel period as well. Useful figure.
-

Graeme
- Posts: 1565
- Member since:
27 Nov 2015, 02:39
Graeme wrote:I'd like to copy the sivered wood effect on the hay wain if I can, but mine will have to have Fred Flintstone, solid log, wheels; the spoked wheels were commandeered for Boudica's chariot.
Please don't, I use Airfix French Artillery wheels to replace them for decent ones, if you need any, I would gladly send you some.
Peter wrote:@Chris: don't mention the drivers. They are weird.
Yep!
Graeme wrote:The standing figure is kind of weird but the seated one is at least wearing a good depiction of the smock and broad brimmed hat that were typical for 18th & 19th Century wagoners. I think he might not look too far amiss back in the Medievel period as well. Useful figure.
Sadly those were missing in the set I purchased.
-
steve_pickstock
- Posts: 1311
- Member since:
20 Jun 2010, 19:56
steve_pickstock wrote:Please don't, I use Airfix French Artillery wheels to replace them for decent ones, if you need any, I would gladly send you some.
Thanks for the kind offer Steve. I do have some of the Airfix French artillery, I also have some portuguese guns that are hard work to get into a serviceable condition but the wheels are OK, and how many rocket carts do I need?
I'll probably use the other set of good wheels on the hay wain because I think it's a nice model and with a bit of swapping around I can probably find some decent wheels for the other cart. Perhaps I could use the Airfix chariot wheels for millstones?
-
Graeme
- Posts: 1565
- Member since:
27 Nov 2015, 02:39
Good afternoon all, I hope this finds you well.
You can never have too many rocket carts. But the offer is there if ever you want the wheels.
Cool!
After my last update - and all the fuss and bother about carts, this is a relatively small one. I think that I am coming to the end of this build, it has been nearly eight months so far, and I have pretty much acheived nearl everything I wanted to do. I would like to do another facade, and do some civilians, but while I was looking for something, I found a box (two boxes actually) with some bits I had put aside for another project and some of this week has been spent on that.
The other thing that happened this week, was that I gave in and bought a magnifier headset. While I was working on these last two figures I just couldn't focus on them properly.
The one I settled on was this one and it works a charm!
https://www.amazon.co.uk/gp/product/B08 ... UTF8&psc=1
On with it then.
The cart.


So apart from finishing the base off with some dry brushing, this one is done and I am very happy with it.
While I was working on this, I dug out one of the Strelets R wagons. Basically I threw a lot of it away, due to it looking nothing like any cart every designed by man.
I kept the front axle, the bed of the cart and the wheels.
Drilled out the front axle and added some plastic coated iron rod to serve as the shafts, cut some bits of Evergreen plastic strip and filed it round to make a rear axle, drilled out the wheels to take the axles more easily, glued it together and it'll do. It isn't pretty - a Trabant sort of cart.


I have been working on a figure as well.
The chap in the pink suit who inspired the figure with the half-cloak, and suggested the man throwing his cloak, was so happy with the figure he posted the pictures on his Facebook page. This led to the chap he had been fighting in the original picture to ask "Where's mine?"
This was good and bad news.
The good news was that he wore a simple green coat.
The bad news was that none of the figures I have left from those sets are in simple coats. they're all wearing scarves.
Solution cut the scarf away. Despite a new sharp blade, it was not pretty and I ended up using UV cured resin to repair the surface, and up to now, I have used Tamiya Micro-masking tape to make a baldric for his sword.


I'm not happy with it, I think I might need to get the Miliput out again and re-do the panels on the coat and the baldric in putty.
Last of all a teaser.
I have been working towards this project for some years now, after seeing the prototype.

I am going to let you guess what it is all about - no prizes, just kudos, the figure is sort of appropriate.
That is all for now, back Wednesday.
Hope you all stay safe, Pickers.
(56848)
Graeme wrote:Thanks for the kind offer Steve. I do have some of the Airfix French artillery, I also have some portuguese guns that are hard work to get into a serviceable condition but the wheels are OK, and how many rocket carts do I need?
You can never have too many rocket carts. But the offer is there if ever you want the wheels.
Graeme wrote:I'll probably use the other set of good wheels on the hay wain because I think it's a nice model and with a bit of swapping around I can probably find some decent wheels for the other cart. Perhaps I could use the Airfix chariot wheels for millstones?
Cool!
After my last update - and all the fuss and bother about carts, this is a relatively small one. I think that I am coming to the end of this build, it has been nearly eight months so far, and I have pretty much acheived nearl everything I wanted to do. I would like to do another facade, and do some civilians, but while I was looking for something, I found a box (two boxes actually) with some bits I had put aside for another project and some of this week has been spent on that.
The other thing that happened this week, was that I gave in and bought a magnifier headset. While I was working on these last two figures I just couldn't focus on them properly.
The one I settled on was this one and it works a charm!
https://www.amazon.co.uk/gp/product/B08 ... UTF8&psc=1
On with it then.
The cart.
So apart from finishing the base off with some dry brushing, this one is done and I am very happy with it.
While I was working on this, I dug out one of the Strelets R wagons. Basically I threw a lot of it away, due to it looking nothing like any cart every designed by man.
I kept the front axle, the bed of the cart and the wheels.
Drilled out the front axle and added some plastic coated iron rod to serve as the shafts, cut some bits of Evergreen plastic strip and filed it round to make a rear axle, drilled out the wheels to take the axles more easily, glued it together and it'll do. It isn't pretty - a Trabant sort of cart.
I have been working on a figure as well.
The chap in the pink suit who inspired the figure with the half-cloak, and suggested the man throwing his cloak, was so happy with the figure he posted the pictures on his Facebook page. This led to the chap he had been fighting in the original picture to ask "Where's mine?"
This was good and bad news.
The good news was that he wore a simple green coat.
The bad news was that none of the figures I have left from those sets are in simple coats. they're all wearing scarves.
Solution cut the scarf away. Despite a new sharp blade, it was not pretty and I ended up using UV cured resin to repair the surface, and up to now, I have used Tamiya Micro-masking tape to make a baldric for his sword.
I'm not happy with it, I think I might need to get the Miliput out again and re-do the panels on the coat and the baldric in putty.
Last of all a teaser.
I have been working towards this project for some years now, after seeing the prototype.
I am going to let you guess what it is all about - no prizes, just kudos, the figure is sort of appropriate.
That is all for now, back Wednesday.
Hope you all stay safe, Pickers.
(56848)
-
steve_pickstock
- Posts: 1311
- Member since:
20 Jun 2010, 19:56
Help keep the forum online!
or become a supporting member
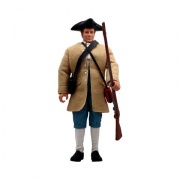
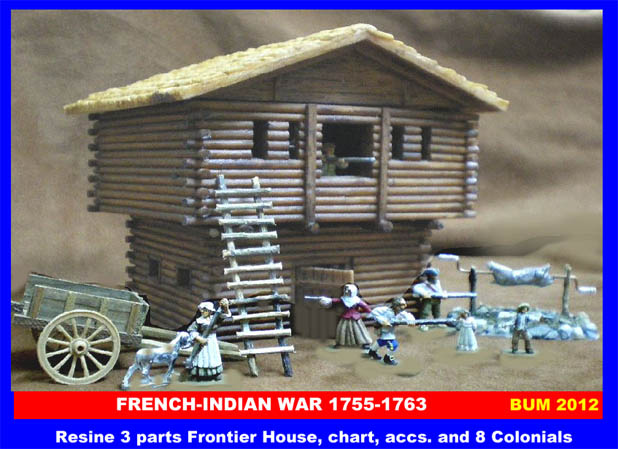
Peter wrote:The teaser, there I think it is something for the French Indian War or the Independence war of America.
Are you trying to built something like this?
Sorry Peter, not even close.
Here is another taster.

Anyway on with the Musketeers update.
I'm starting to look at another facade build, based on this image

Ignore the figures in the picture - there is so much wrong with this video, but I think I can do a lot with this building.
In the last update I showed this rough figure.
I really wasn't happy about so much of it that I stripped the tape off, gave it a good scrub and started at it, again.
The coat panels and the baldric were re-done in miliput, and the figure repainted using various greens by Vallejo (I used so many different colours, I didn't note the titles down ).
But I think this is much better.


So just to recap the figure is based on the friend of the chap in the pink suit with the half cloak, I did a few weeks ago.
So here they both are in action.


Sorry it's not a big update but thanks for looking in.
Stay safe all, regards Pickers.
(61369)
-
steve_pickstock
- Posts: 1311
- Member since:
20 Jun 2010, 19:56
First off please allow me to apologise for not having much in the way of a Musketeers update today.
I have been up in the attic, and working solidly, but most of it has been on all of the other projects bar the one set in Paris in 1625. The steampunk tour bus, white horses, orcses, and general other stuff have all had work done on them. The musketeers got some bases painted, and that pretty much is it.
To compensate, may I offer this little hint or tip. I suppose today it is known as a "life hack". All I know is that it's something I have been doing for a long time and it's useful.
Eat a tube of Pringles (or a pring of tubles, you choose) - this could be a solitary experience or you can do it with loved ones, either in one session or over a period of time, but the object is to end up with an empty tube and the plastic cap.
It's the plastic cap we require.
If like me, you find yourself working with small amounts of colour and can't be bothered to break out the wet palette - this plastic cap is your salvation.
Use it as a palette, simple as that!!
But here is the clever bit. When your palette/Pringles tube cap gets clagged up with paint -

Flex the cap till the paint cracks or wrinkles, get a craft knife blade under it, and peal the dried paint back.

Peel the paint off the cap and dispose of it safely, and you have a nice clean palette.

I have never done this with enamel paints but i have done with every type of acrylic paint - GW, Vallejo, Revell, Humbrol, craft paints the lot.
Thanks for looking in, stay safe
Pickers.
(66872)
I have been up in the attic, and working solidly, but most of it has been on all of the other projects bar the one set in Paris in 1625. The steampunk tour bus, white horses, orcses, and general other stuff have all had work done on them. The musketeers got some bases painted, and that pretty much is it.
To compensate, may I offer this little hint or tip. I suppose today it is known as a "life hack". All I know is that it's something I have been doing for a long time and it's useful.
Eat a tube of Pringles (or a pring of tubles, you choose) - this could be a solitary experience or you can do it with loved ones, either in one session or over a period of time, but the object is to end up with an empty tube and the plastic cap.
It's the plastic cap we require.
If like me, you find yourself working with small amounts of colour and can't be bothered to break out the wet palette - this plastic cap is your salvation.
Use it as a palette, simple as that!!
But here is the clever bit. When your palette/Pringles tube cap gets clagged up with paint -
Flex the cap till the paint cracks or wrinkles, get a craft knife blade under it, and peal the dried paint back.
Peel the paint off the cap and dispose of it safely, and you have a nice clean palette.
I have never done this with enamel paints but i have done with every type of acrylic paint - GW, Vallejo, Revell, Humbrol, craft paints the lot.
Thanks for looking in, stay safe
Pickers.
(66872)
-
steve_pickstock
- Posts: 1311
- Member since:
20 Jun 2010, 19:56
So yesterday was exhausting. Sunday drivers, bizarre road layouts, we got to a field in Staffordshire, eventually. Saw some people I haven't seen in a while, met some new people, came home and flaked out.
Today, though, I spent some time in the attic, working through an idea to make something to recreate an iconic scene from the 1974 Three Musketeers film.
I started this back in February but it got placed on a back-burner because of the facades. Coming back to it, I changed the approach to make them more durable, more able to take being handled.
Here is the teaser. No prizes for guessing just kudos. By way of a clue - each of the posts, is taller than a 1/72nd scale figure. The gaps are about 60mm.
-
steve_pickstock
- Posts: 1311
- Member since:
20 Jun 2010, 19:56